Wide Grip Bent Over Row

The wide grip bent over row is an effective exercise that targets your upper back muscles. This compound exercise also works your shoulders, biceps, and forearms. It's a must-do exercise for anyone looking to build a strong and muscular back.
How to Do a Wide Grip Bent Over Row

To perform a wide grip bent over row, follow these steps:
- Stand with your feet shoulder-width apart and hold a barbell with an overhand grip that's wider than shoulder-width apart.
- Bend at your hips and keep your back straight.
- Lower the barbell towards the ground while keeping your arms extended.
- Pull the barbell towards your upper abdomen while keeping your elbows close to your body.
- Lower the barbell back to the starting position and repeat for the desired number of reps.
Benefits of Wide Grip Bent Over Rows

The wide grip bent over row has many benefits, including:
- Strengthening your upper back muscles
- Improving your posture
- Increasing your pulling strength
- Working your shoulders, biceps, and forearms
- Helping to prevent injuries
Variations of Wide Grip Bent Over Rows

There are several variations of the wide grip bent over row, including:
- Close grip bent over row
- Single arm dumbbell bent over row
- Pendlay row
- T-bar row
Tips for Doing Wide Grip Bent Over Rows

Here are some tips to help you perform wide grip bent over rows correctly:
- Keep your back straight and avoid rounding it.
- Engage your core muscles to stabilize your spine.
- Use a weight that allows you to perform the exercise with proper form.
- Don't jerk the weight up, use a controlled motion.
- Breathe out as you pull the weight towards your upper abdomen and breathe in as you lower it back down.
Incorporating Wide Grip Bent Over Rows into Your Workout Routine

You can incorporate wide grip bent over rows into your back workout routine by doing 3-4 sets of 8-12 reps. You can also superset them with other exercises like pull-ups or lat pulldowns for an even greater back workout.
Conclusion
The wide grip bent over row is a great exercise for building a strong and muscular back. With the right form and technique, you can reap the benefits of this compound exercise and achieve your fitness goals.
Related video of Wide Grip Bent Over Row: A Comprehensive Guide
Improving Hip Internal Rotation

Introduction
Hip internal rotation is the degree to which the hip joint can rotate inwardly. Limited hip internal rotation is a common problem among people of all ages and can lead to various conditions and injuries, such as hip impingement and lower back pain. Improving hip internal rotation can help to prevent these issues and improve overall mobility and performance.Anatomy of the Hip Joint
Before we discuss how to improve hip internal rotation, it's important to understand the anatomy of the hip joint. The hip joint is a ball-and-socket joint that connects the thigh bone (femur) to the pelvis. The head of the femur fits into a socket in the pelvis, allowing for a wide range of motion.Causes of Limited Hip Internal Rotation
There are several factors that can contribute to limited hip internal rotation, including tight hip muscles, poor posture, and previous injuries. Sitting for extended periods of time can also cause tightness in the hip flexors, which can limit hip internal rotation.Stretching for Hip Internal Rotation
One of the best ways to improve hip internal rotation is through stretching. Here are some effective stretches to try:
- Pigeon Pose: Start in a tabletop position and bring one knee forward, placing it behind your hand. Extend your other leg behind you and lower your body down, resting your forehead on your hands. Hold for 30 seconds and then switch sides.
- Figure Four Stretch: Lie on your back with your knees bent and feet flat on the ground. Cross one ankle over the opposite knee and gently pull the knee towards your chest. Hold for 30 seconds and then switch sides.
- Seated Butterfly Stretch: Sit on the ground with the soles of your feet together and your knees out to the sides. Gently press down on your knees with your hands to increase the stretch. Hold for 30 seconds.
Strengthening Exercises for Hip Internal Rotation
In addition to stretching, strengthening exercises can also help to improve hip internal rotation. Here are some exercises to try:
- Clamshells: Lie on your side with your knees bent and your feet together. Keeping your heels together, lift your top knee as high as you can without moving your pelvis. Lower back down and repeat for 10-15 reps on each side.
- Hip Rotations: Lie on your back with your knees bent and feet flat on the ground. Keeping your knees together, rotate your hips to one side as far as you can without lifting your shoulders off the ground. Return to center and repeat on the other side for 10-15 reps.
- Resistance Band Walks: Place a resistance band around your ankles and stand with your feet hip-width apart. Step to one side with one foot, keeping tension on the band. Follow with the other foot, taking 10-15 steps in each direction.
Conclusion
Improving hip internal rotation is important for overall mobility and can help to prevent injuries and conditions such as hip impingement and lower back pain. By incorporating stretching and strengthening exercises into your routine, you can improve your hip internal rotation and enjoy better performance in your daily activities.Related video of Improving Hip Internal Rotation
Med Ball Push Press

The med ball push press is an effective exercise that targets the upper body, lower body, and core. This exercise can be performed by anyone, from beginners to advanced athletes, and it requires only a medicine ball. In this article, we will discuss how to perform the med ball push press and its benefits.
How to Perform the Med Ball Push Press

To perform the med ball push press, follow these steps:
- Stand with your feet shoulder-width apart and hold a medicine ball with both hands at chest level.
- Bend your knees and lower your body into a quarter squat position.
- Quickly extend your legs and push the medicine ball overhead, keeping your arms straight.
- Lower the medicine ball back to your chest and repeat for the desired number of reps.
It's important to maintain a tight core and keep your back straight throughout the exercise.
Benefits of the Med Ball Push Press

The med ball push press offers numerous benefits, including:
- Improves upper body strength: The med ball push press targets the shoulders, chest, and triceps, helping to improve upper body strength.
- Develops lower body power: The explosive movement of the med ball push press requires a strong lower body, making it a great exercise for developing lower body power.
- Increases core stability: The med ball push press requires a tight core to maintain proper form, which can help improve core stability.
- Enhances athletic performance: The med ball push press is a functional exercise that mimics many movements in sports, making it a great exercise for enhancing overall athletic performance.
- Burns calories: The med ball push press is a full-body exercise that can help burn calories and improve cardiovascular fitness.
Conclusion
The med ball push press is a versatile exercise that offers numerous benefits for athletes of all levels. By incorporating this exercise into your training routine, you can improve upper body strength, lower body power, core stability, and overall athletic performance. Give the med ball push press a try and see the results for yourself!
Related video of Med Ball Push Press: How to Perform and Benefits
Standing Ez Bar Curl

If you're looking to build bigger biceps, then the standing Ez bar curl is a must-have exercise in your routine. This exercise is designed to target the bicep muscles, helping you to achieve the strong and toned arms you've always wanted. In this article, we'll take an in-depth look at the standing Ez bar curl, including its benefits, how to perform it, and some tips to help you get the most out of your workouts.
What Are the Benefits of Standing Ez Bar Curls?

Before we get into the specifics of how to perform a standing Ez bar curl, let's take a moment to discuss the benefits of this exercise. One of the primary benefits of the standing Ez bar curl is that it targets the biceps, helping to increase muscle size and strength. Additionally, this exercise can help to improve grip strength, which can be beneficial in other exercises.
Another great benefit of the standing Ez bar curl is that it can be a great addition to any workout routine. Whether you're a beginner or an experienced lifter, this exercise can help you to achieve your fitness goals.
How to Perform a Standing Ez Bar Curl

Now that you know the benefits of standing Ez bar curls, let's take a look at how to perform this exercise. Follow these steps to get started:
- Begin by standing with your feet shoulder-width apart and your knees slightly bent.
- Grasp the Ez bar with an underhand grip and your hands shoulder-width apart.
- Keeping your elbows close to your body, lift the bar towards your chest.
- Slowly lower the bar back down to the starting position.
- Repeat for the desired number of reps.
When performing a standing Ez bar curl, it's important to maintain good form. Keep your elbows close to your body throughout the exercise, and avoid swinging the bar or using momentum to lift it. This will help to ensure that you're targeting the bicep muscles and getting the most out of your workout.
Tips for Getting the Most Out of Your Workouts

If you want to get the most out of your standing Ez bar curl workouts, here are a few tips to keep in mind:
- Start with a lighter weight and gradually increase as you become stronger.
- Focus on good form and avoid using momentum to lift the bar.
- Incorporate other bicep exercises into your routine for a well-rounded workout.
- Rest for at least 48 hours between bicep workouts to allow your muscles to recover.
By following these tips, you can ensure that you're getting the most out of your standing Ez bar curl workouts and achieving your fitness goals.
Conclusion
The standing Ez bar curl is a great exercise for building bigger biceps and improving grip strength. By following the steps outlined in this article and incorporating these tips into your workout routine, you can get the most out of this exercise and achieve the strong and toned arms you've always wanted.
Related video of Standing Ez Bar Curl: The Ultimate Guide to Building Biceps
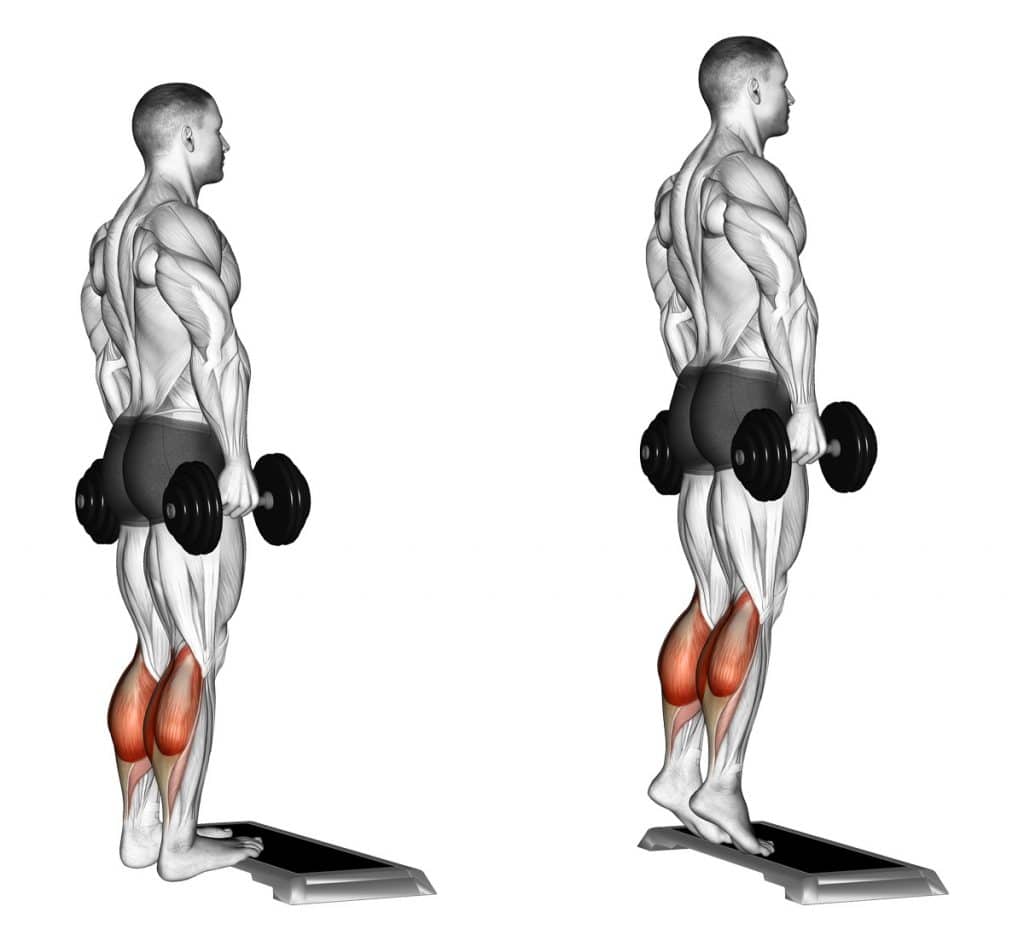
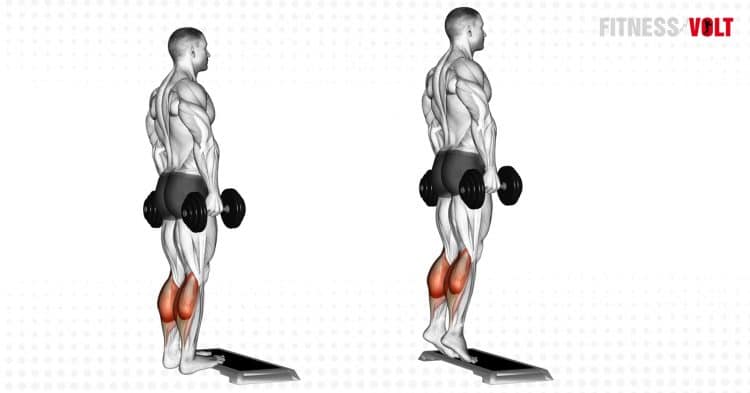
Db Standing Calf Raise
The Db Standing Calf Raise is an incredibly effective exercise for strengthening and toning the calf muscles. It is a simple exercise that can be done at the gym or at home with just a set of dumbbells. In this article, we will take a closer look at the benefits of the Db Standing Calf Raise, how to perform it correctly, and some tips to help you get the most out of your calf workout.
Benefits of the Db Standing Calf Raise

The Db Standing Calf Raise targets the gastrocnemius and soleus muscles in the calves, which are responsible for plantar flexion or the ability to point the toes. By strengthening these muscles, you can improve your balance, stability, and overall athleticism. Additionally, toned calves can also enhance the appearance of your legs, making them look leaner and more defined.
How to Perform the Db Standing Calf Raise
To perform the Db Standing Calf Raise, follow these simple steps:
- Stand with your feet shoulder-width apart and hold a dumbbell in each hand.
- Place the balls of your feet on a raised surface such as a step or weight plate.
- Slowly raise your heels as high as you can, then lower them back down to the starting position.
- Repeat for the desired number of reps.
It's important to keep your core engaged and your back straight throughout the exercise. You should also avoid bouncing at the bottom of the movement and instead, pause briefly before lifting your heels back up.
Tips for Getting the Most Out of Your Calf Workout

If you want to maximize the benefits of the Db Standing Calf Raise, try incorporating these tips into your calf workout:
- Vary your foot placement by turning your toes inward or outward for different angles of activation.
- Use a weight that is challenging but still allows you to maintain proper form.
- Perform calf stretches before and after your workout to prevent injury and improve flexibility.
- Incorporate other calf exercises such as seated calf raises and calf raises on a leg press machine for a well-rounded workout.
Conclusion
The Db Standing Calf Raise is a simple yet effective exercise that can help you strengthen and tone your calf muscles. By incorporating this exercise into your workout routine and following the tips outlined above, you can achieve stronger, leaner, and more defined calves in no time.