
If you're looking to strengthen your calves, one exercise you might want to consider is the one-legged calf raise. As the name suggests, this exercise involves lifting your body weight with one leg while keeping the other leg off the ground.
Why One Legged Calf Raises Are Important

Strong calves are important for many reasons. They help with balance, stability, and posture. They also play a key role in running, jumping, and other activities that involve lower body strength.
One-legged calf raises are especially valuable because they work each calf individually, helping to prevent imbalances and weaknesses.
How to Do One Legged Calf Raises

To perform a one-legged calf raise, follow these steps:
- Stand with your feet shoulder-width apart and your hands on your hips or out to the sides for balance.
- Lift one foot off the ground and balance on the other foot.
- Raise your heel as high as you can, feeling a stretch in your calf muscle.
- Lower your heel back down to the ground.
- Repeat for 10-15 reps, then switch legs and repeat.
As you get stronger, you can increase the number of reps or hold a weight in your hand for added resistance.
Tips for Success

Here are some tips to help you get the most out of your one-legged calf raises:
- Start with a low number of reps and gradually work your way up to avoid injury.
- Focus on maintaining good balance and form throughout the exercise.
- Breathe deeply and naturally throughout the exercise.
- Don't rush through the movement; take your time and focus on the contraction of your calf muscle.
- If you're having trouble balancing, try doing the exercise near a wall or other stable object that you can hold onto for support.
Variations on One Legged Calf Raises

If you're looking for a challenge, there are several variations on the one-legged calf raise that you can try:
- Do the exercise with a weight in your hand for added resistance.
- Perform the exercise on a step or other elevated surface to increase the range of motion.
- Try doing the exercise with your toes turned out or in to target different parts of your calf muscle.
Conclusion
One-legged calf raises are a simple but effective exercise that can help you build strong, balanced calves. By following these tips and variations, you can take your calf training to the next level and achieve even better results.
Related video of One Legged Calf Raises: The Ultimate Guide

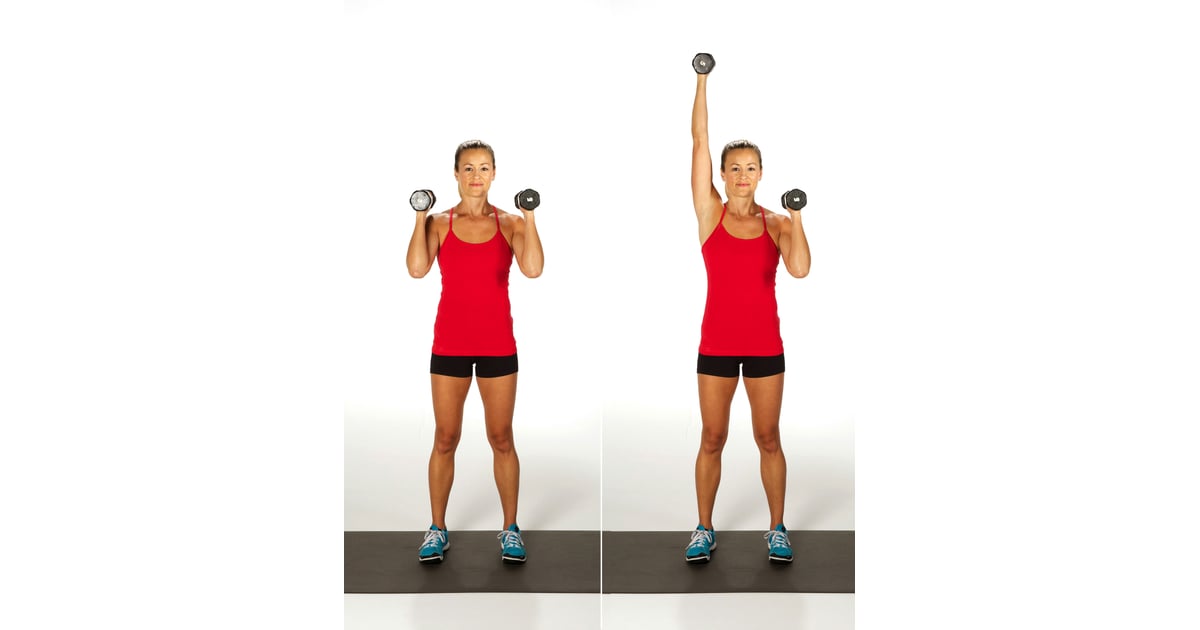
The one arm shoulder dumbbell press is an effective exercise that targets your shoulders, triceps, and core. This exercise is a great way to increase your shoulder strength, improve your posture, and prevent shoulder injuries. In this article, we will discuss the benefits of the one arm shoulder dumbbell press and the correct technique to perform this exercise.
Benefits of the One Arm Shoulder Dumbbell Press

The one arm shoulder dumbbell press is a compound exercise that targets multiple muscle groups. Here are some of the benefits of this exercise:
- Increased Shoulder Strength: The one arm shoulder dumbbell press is a great way to increase your shoulder strength. This exercise targets your shoulder muscles, including your deltoids, which are responsible for shoulder abduction and flexion.
- Better Posture: The one arm shoulder dumbbell press can help improve your posture. By strengthening your shoulder muscles, you will be able to maintain a more upright position, which can help prevent slouching and hunching.
- Prevention of Shoulder Injuries: By strengthening your shoulder muscles, you can help prevent shoulder injuries. This exercise can also help improve the stability of your shoulder joint, which can reduce the risk of dislocation or other injuries.
- Core Stability: The one arm shoulder dumbbell press requires you to engage your core muscles to maintain stability. This can help improve your overall core strength and stability.
Technique for One Arm Shoulder Dumbbell Press

Here is the correct technique for performing the one arm shoulder dumbbell press:
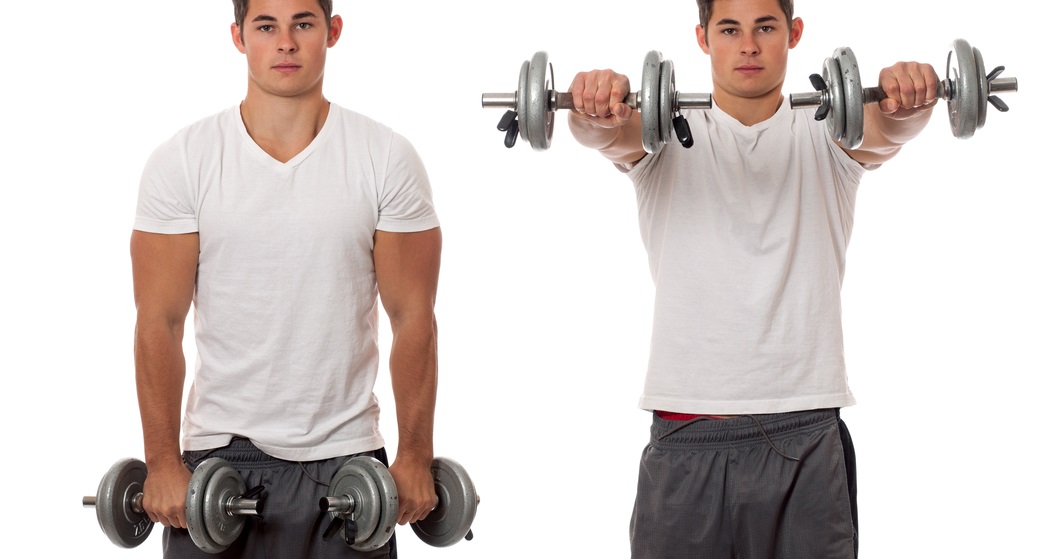
- Stand with your feet shoulder-width apart and hold a dumbbell in your right hand.
- Bring the dumbbell to your shoulder, with your elbow bent and pointing outwards.
- Press the dumbbell overhead, extending your arm fully.
- Lower the dumbbell back to your shoulder and repeat for the desired number of repetitions.
- Switch to your left arm and repeat the exercise.
When performing this exercise, it is important to maintain proper form. Here are some tips to help you perform the one arm shoulder dumbbell press correctly:
- Keep your core engaged throughout the exercise.
- Avoid arching your back or leaning to one side.
- Keep your elbow pointing outwards throughout the exercise.
- Don’t lock your elbow when you extend your arm.
How to Incorporate One Arm Shoulder Dumbbell Press into Your Workout
The one arm shoulder dumbbell press can be incorporated into your upper body workout routine. Here is an example of how to include this exercise in your workout:
- Warm up with some light cardio for 5-10 minutes.
- Perform 3 sets of 8-12 repetitions of the one arm shoulder dumbbell press on each arm.
- Follow with 3 sets of push-ups or chest press to target your chest muscles.
- Finish with 3 sets of lateral raises to target your shoulder muscles.
- Cool down with some stretching for your upper body.
Conclusion
The one arm shoulder dumbbell press is a great exercise to target your shoulder muscles, increase your shoulder strength, and improve your posture. By incorporating this exercise into your workout routine, you can help prevent shoulder injuries and improve your overall upper body strength. Remember to maintain proper form and engage your core muscles throughout the exercise.
Related video of One Arm Shoulder Dumbbell Press: Benefits and Technique

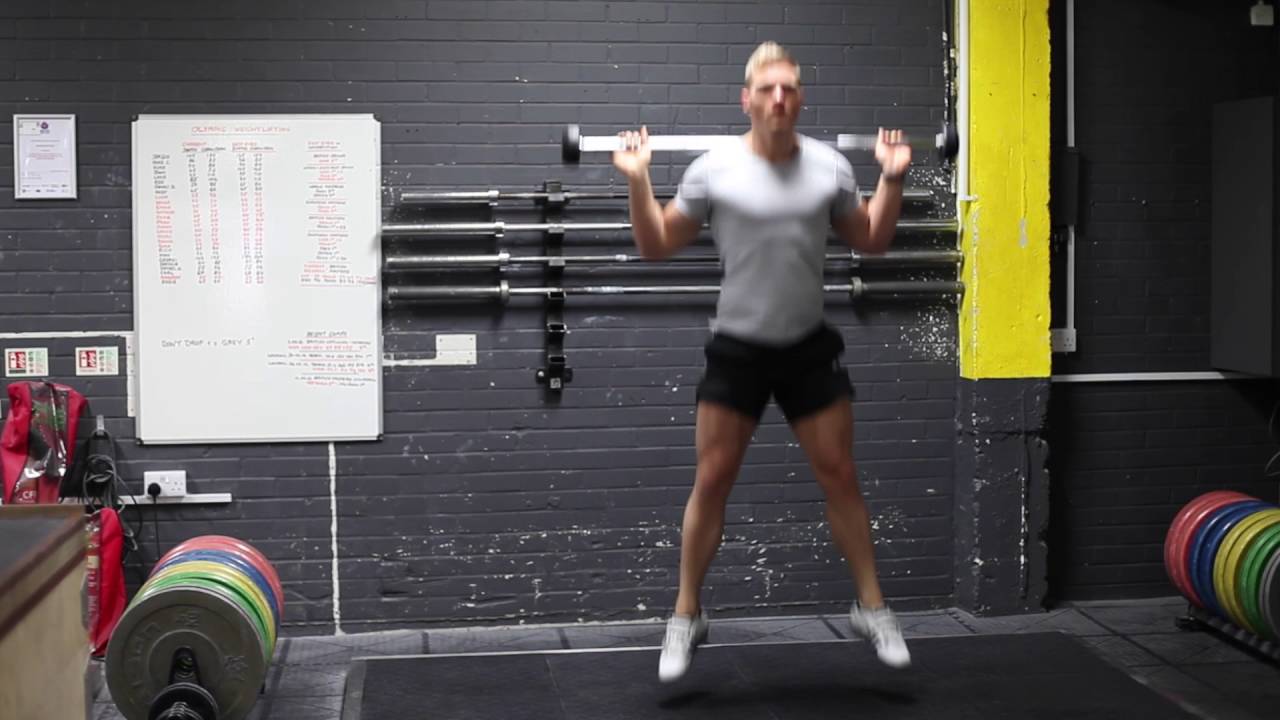
Jumping squats with barbell are a popular exercise among fitness enthusiasts because they help build explosive power and strength in the lower body. This exercise involves performing a squat with a barbell on your shoulders and then jumping explosively as you stand up. In this article, we will discuss everything you need to know about jumping squats with barbell.
Benefits of Jumping Squats With Barbell

Jumping squats with barbell come with a range of benefits, including:
- Improving explosive power in the lower body
- Building strength in the legs, glutes, and core muscles
- Burning calories and aiding in weight loss
- Improving overall athletic performance
How to Do Jumping Squats With Barbell

Before starting with jumping squats with barbell, it is essential to warm up properly. This will help prevent injury and enhance the effectiveness of the exercise. Here are the steps to perform jumping squats with barbell:
- Start by standing with your feet shoulder-width apart and a barbell resting on your upper back.
- Slowly lower your body into a squat position, keeping your back straight and your knees behind your toes.
- As you start to stand up, push through your heels and jump explosively off the ground.
- Land softly and immediately lower back into a squat position.
- Repeat for the desired number of reps.
Common Mistakes to Avoid

While jumping squats with barbell are a great exercise for building lower body strength, there are some common mistakes that people make. Here are a few mistakes to avoid:
- Not warming up properly
- Using too much weight
- Leaning too far forward or backward as you squat
- Letting your knees cave in as you squat
- Landing too hard on the ground after jumping
Variations of Jumping Squats With Barbell

There are several variations of jumping squats with barbell that you can try to switch up your workout routine:
- Jumping squats with dumbbells
- Jumping squats with resistance bands
- Single-leg jumping squats with barbell
- Plyometric jumping squats with barbell
Precautions
While jumping squats with barbell can be a great exercise for building explosive power and strength, it is essential to take some precautions to avoid injury:
- Always warm up properly before starting the exercise.
- Start with a light weight and gradually increase the weight as you get stronger.
- Make sure to keep your back straight and your knees behind your toes as you squat.
- Land softly and quietly after jumping to avoid unnecessary impact on your joints.
Conclusion
Jumping squats with barbell are an effective exercise for building explosive power and strength in the lower body. By following the proper technique and taking necessary precautions, you can enjoy the benefits of this exercise and avoid injury. Try adding jumping squats with barbell to your workout routine for a challenging and effective lower body workout.
Related video of Jumping Squats With Barbell: The Ultimate Guide

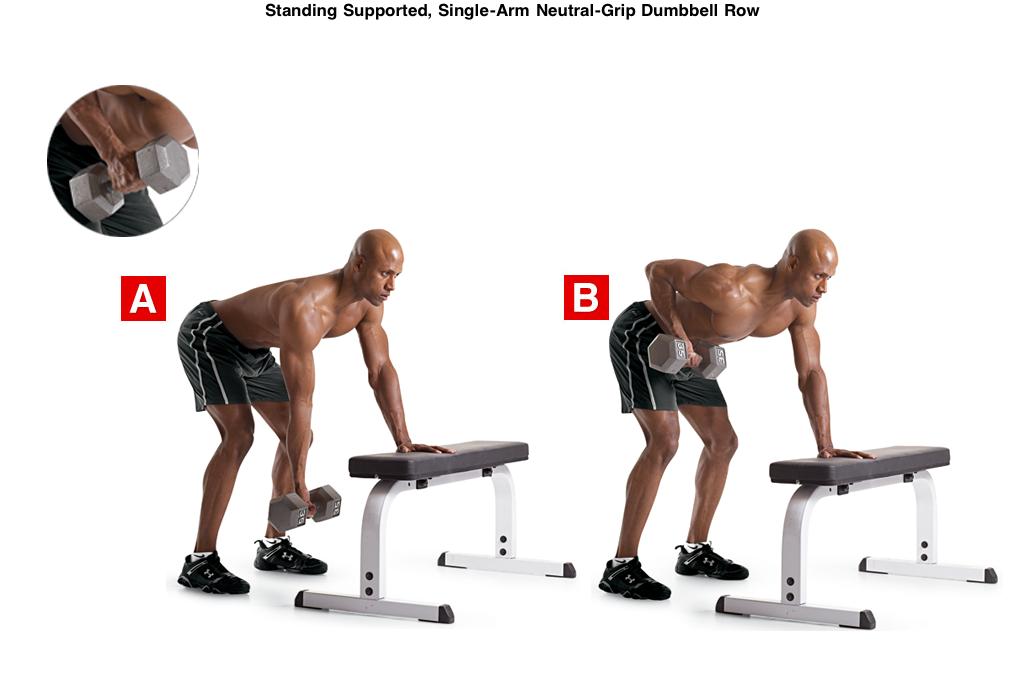
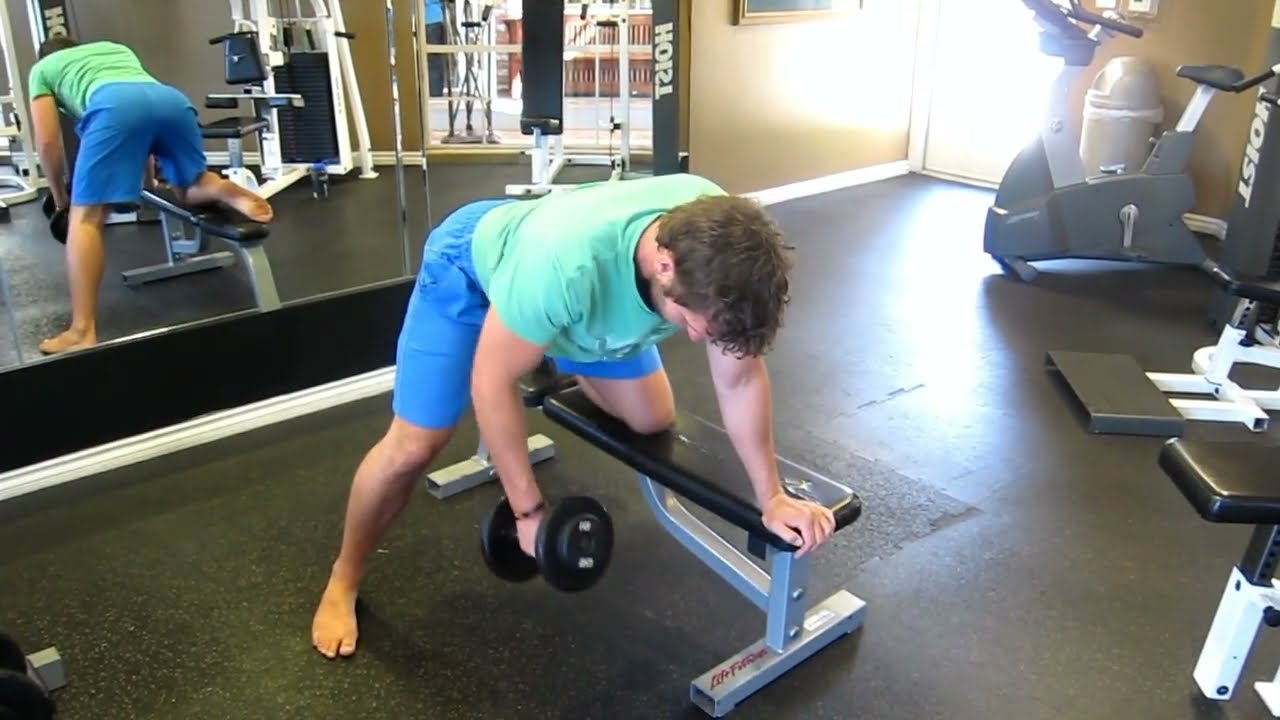
The single arm neutral grip dumbbell row is a popular exercise that targets the muscles of the upper back, shoulders, and arms. This exercise is known for its ability to strengthen the muscles of the back, improve posture, and reduce the risk of injury. In this article, we will take a closer look at the single arm neutral grip dumbbell row and provide you with a comprehensive guide on how to perform it correctly.
What Are the Benefits of Single Arm Neutral Grip Dumbbell Row?
The single arm neutral grip dumbbell row is an excellent exercise for building strength and muscle mass in the upper back, shoulders, and arms. It targets the muscles of the rhomboids, trapezius, and rear deltoids, helping to improve posture and reduce the risk of injury.
This exercise can also help to improve performance in other exercises such as the bench press and overhead press, as well as improve overall upper body strength and stability.
How to Perform Single Arm Neutral Grip Dumbbell Row?

To perform the single arm neutral grip dumbbell row, follow these steps:
- Stand with your feet shoulder-width apart, holding a dumbbell in your right hand with a neutral grip (palms facing each other).
- Bend forward at the waist and brace your core, keeping your back flat and your head in a neutral position.
- With your right arm fully extended, pull the dumbbell up towards your chest, keeping your elbow close to your body.
- Hold the contraction for a second before slowly lowering the dumbbell back to the starting position.
- Repeat for the desired number of repetitions before switching to your left arm.
How Many Reps and Sets Should You Do?
The number of reps and sets you should do depends on your fitness goals and current fitness level. As a general rule, aim for 3-4 sets of 8-12 reps per arm. If you are new to this exercise or weightlifting in general, start with lighter weights and fewer sets and gradually increase the weight and reps over time.
Common Mistakes to Avoid

Here are some common mistakes to avoid when performing the single arm neutral grip dumbbell row:
- Using too much weight
- Not keeping your back flat
- Not bracing your core
- Not pulling the dumbbell towards your chest
- Using momentum to lift the weight
Conclusion
The single arm neutral grip dumbbell row is an effective exercise for building strength and muscle mass in the upper back, shoulders, and arms. By following the correct form and avoiding common mistakes, you can maximize the benefits of this exercise and achieve your fitness goals.
Related video of Single Arm Neutral Grip Dumbbell Row: A Comprehensive Guide

If you are looking for an effective exercise to target your shoulder muscles, then look no further than the dumbbell front lateral raise. This exercise is perfect for building strength and tone in your shoulders, and can be done by anyone, regardless of their fitness level or experience.
What is a Dumbbell Front Lateral Raise?

The dumbbell front lateral raise is a resistance training exercise that targets your anterior deltoids, or the front part of your shoulder muscles. To perform this exercise, you need to stand up straight and hold a pair of dumbbells in front of your thighs with your palms facing down. Then, you lift the dumbbells up until they reach shoulder level, keeping your arms straight and your elbows slightly bent. Finally, you lower the dumbbells back to the starting position and repeat the movement for several repetitions.
Benefits of Dumbbell Front Lateral Raise
The dumbbell front lateral raise is an excellent exercise for developing your shoulder muscles. This exercise not only strengthens your anterior deltoids but also helps to improve your overall shoulder stability and mobility. Additionally, this exercise can help to reduce the risk of shoulder injuries and improve your posture and upper body strength.
How to Do a Dumbbell Front Lateral Raise

Here are the steps to perform a dumbbell front lateral raise:
- Stand up straight with your feet shoulder-width apart and your arms at your sides.
- Hold a pair of dumbbells in front of your thighs with your palms facing down.
- Keep your arms straight and your elbows slightly bent.
- Lift the dumbbells up until they reach shoulder level, keeping your arms straight and your elbows slightly bent.
- Pause for a moment at the top of the movement and squeeze your shoulder muscles.
- Lower the dumbbells back to the starting position and repeat the movement for several repetitions.
Tips for Doing Dumbbell Front Lateral Raises

Here are some tips to help you perform dumbbell front lateral raises correctly:
- Start with a light weight and focus on proper form.
- Keep your elbows slightly bent throughout the movement to reduce stress on your joints.
- Use a controlled motion and avoid swinging your arms.
- Keep your core engaged and your back straight throughout the movement.
- Breathe in as you lift the dumbbells and breathe out as you lower them.
- Do not lift the dumbbells higher than shoulder level to avoid overextension of your shoulder joints.
Variations of Dumbbell Front Lateral Raise

Here are some variations of dumbbell front lateral raises that you can try:
- Dumbbell front lateral raise with a twist: As you lift the dumbbells up, twist your wrists so that your palms are facing up at the top of the movement.
- Alternating dumbbell front lateral raise: Instead of lifting both dumbbells at the same time, lift one arm at a time, alternating between your left and right arms.
- Seated dumbbell front lateral raise: Sit on a bench with your back straight and your feet flat on the floor. Hold the dumbbells in front of your thighs and lift them up to shoulder level.
Conclusion
The dumbbell front lateral raise is an effective exercise for building strength and tone in your shoulder muscles. This exercise can help to improve your shoulder stability, mobility, posture, and upper body strength. By following the proper form and technique, you can perform this exercise safely and effectively. So, add this exercise to your workout routine and see the amazing results!
Related video of Dumbbell Front Lateral Raise: A Comprehensive Guide
As we age, our muscles tend to get tight and less flexible. This can lead to discomfort, pain, and even injury. One area that often gets neglected is the quadriceps and hip flexors. These muscles are crucial for proper posture, balance, and movement. In this article, we will discuss some effective quad and hip flexor stretches that can help you improve your mobility and reduce your risk of injury.
Why Stretch your Quadriceps and Hip Flexors?
The quadriceps are the large muscles in the front of the thigh, while the hip flexors are the muscles that connect the thigh bone to the pelvis. Both these areas play a vital role in our daily movements, such as walking, running, and climbing stairs. When these muscles are tight, they can cause pain and discomfort in the lower back, hips, and knees. Stretching these muscles regularly can help reduce tension and improve your overall flexibility and mobility.
The Basic Quad Stretch

The basic quad stretch is a simple yet effective way to stretch the quadriceps. Here's how to do it:
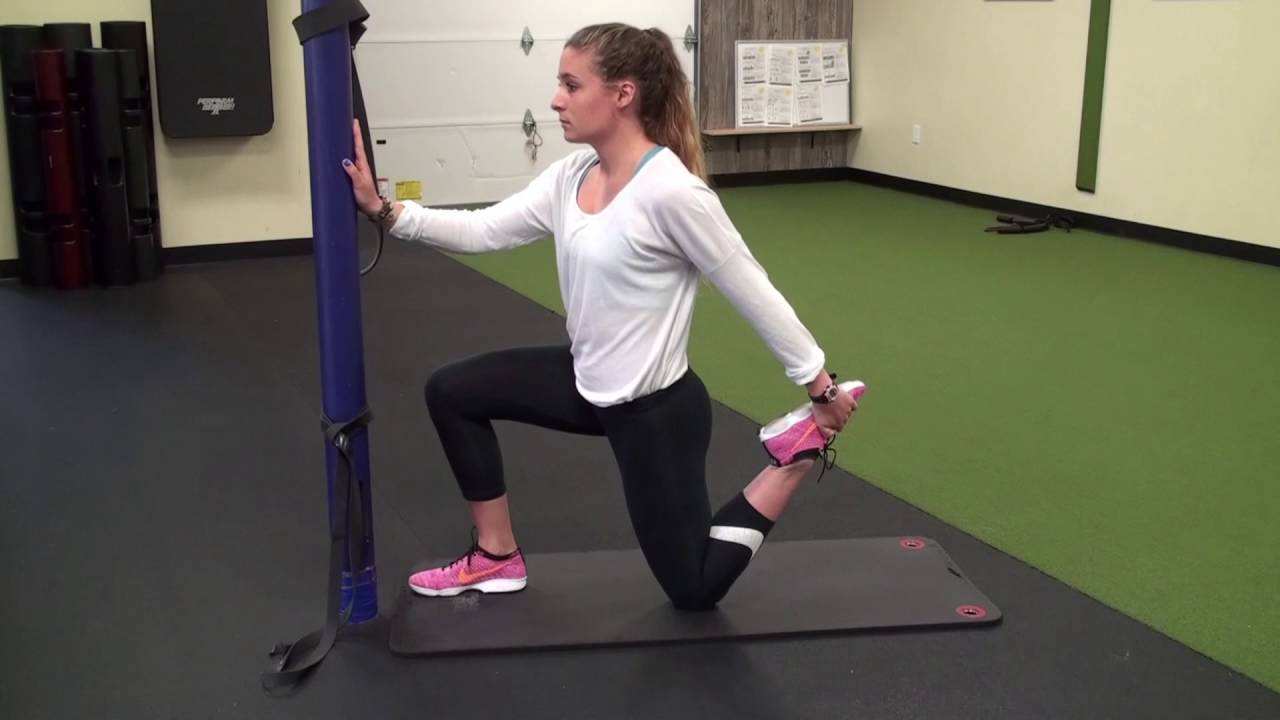
- Stand facing a wall or a sturdy piece of furniture for support.
- Bend your right leg and bring your foot up towards your buttocks.
- Grasp your ankle with your right hand and pull your heel towards your buttocks.
- Hold the stretch for 15-30 seconds and release.
- Repeat on the other side.
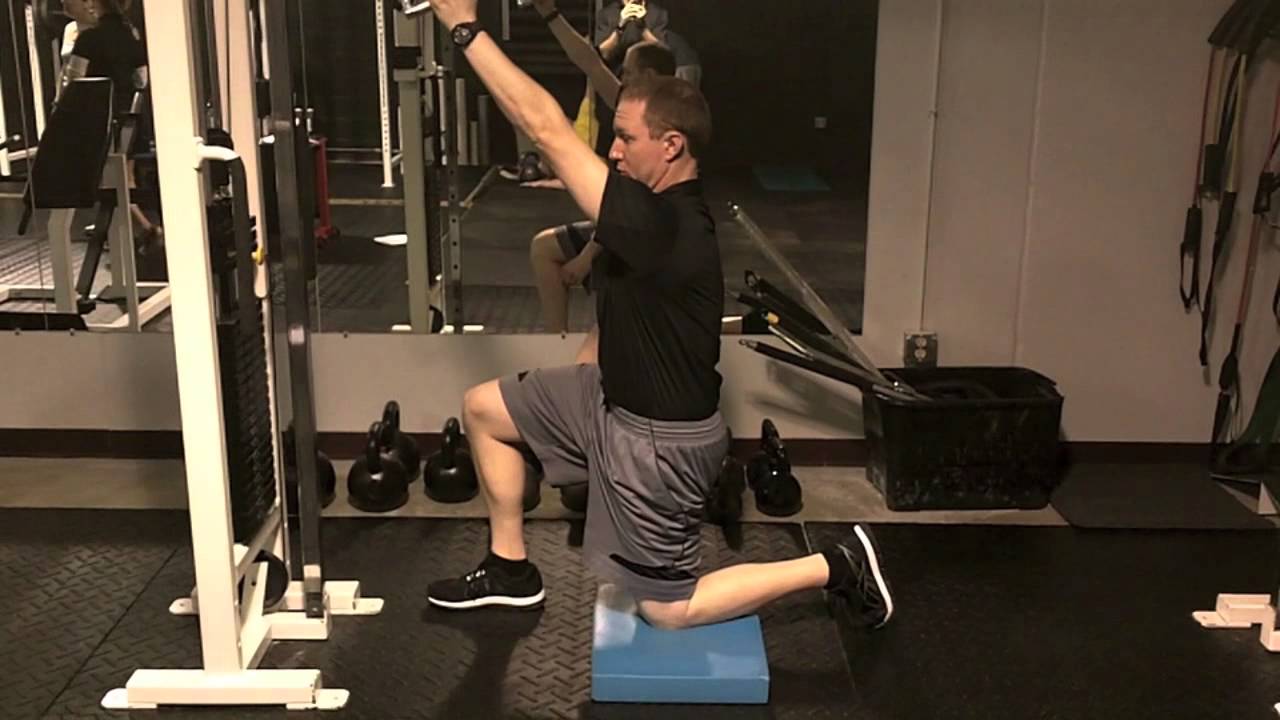
The Lunge Hip Flexor Stretch

The lunge hip flexor stretch targets the hip flexors and can be done in various ways. Here's one way to do it:
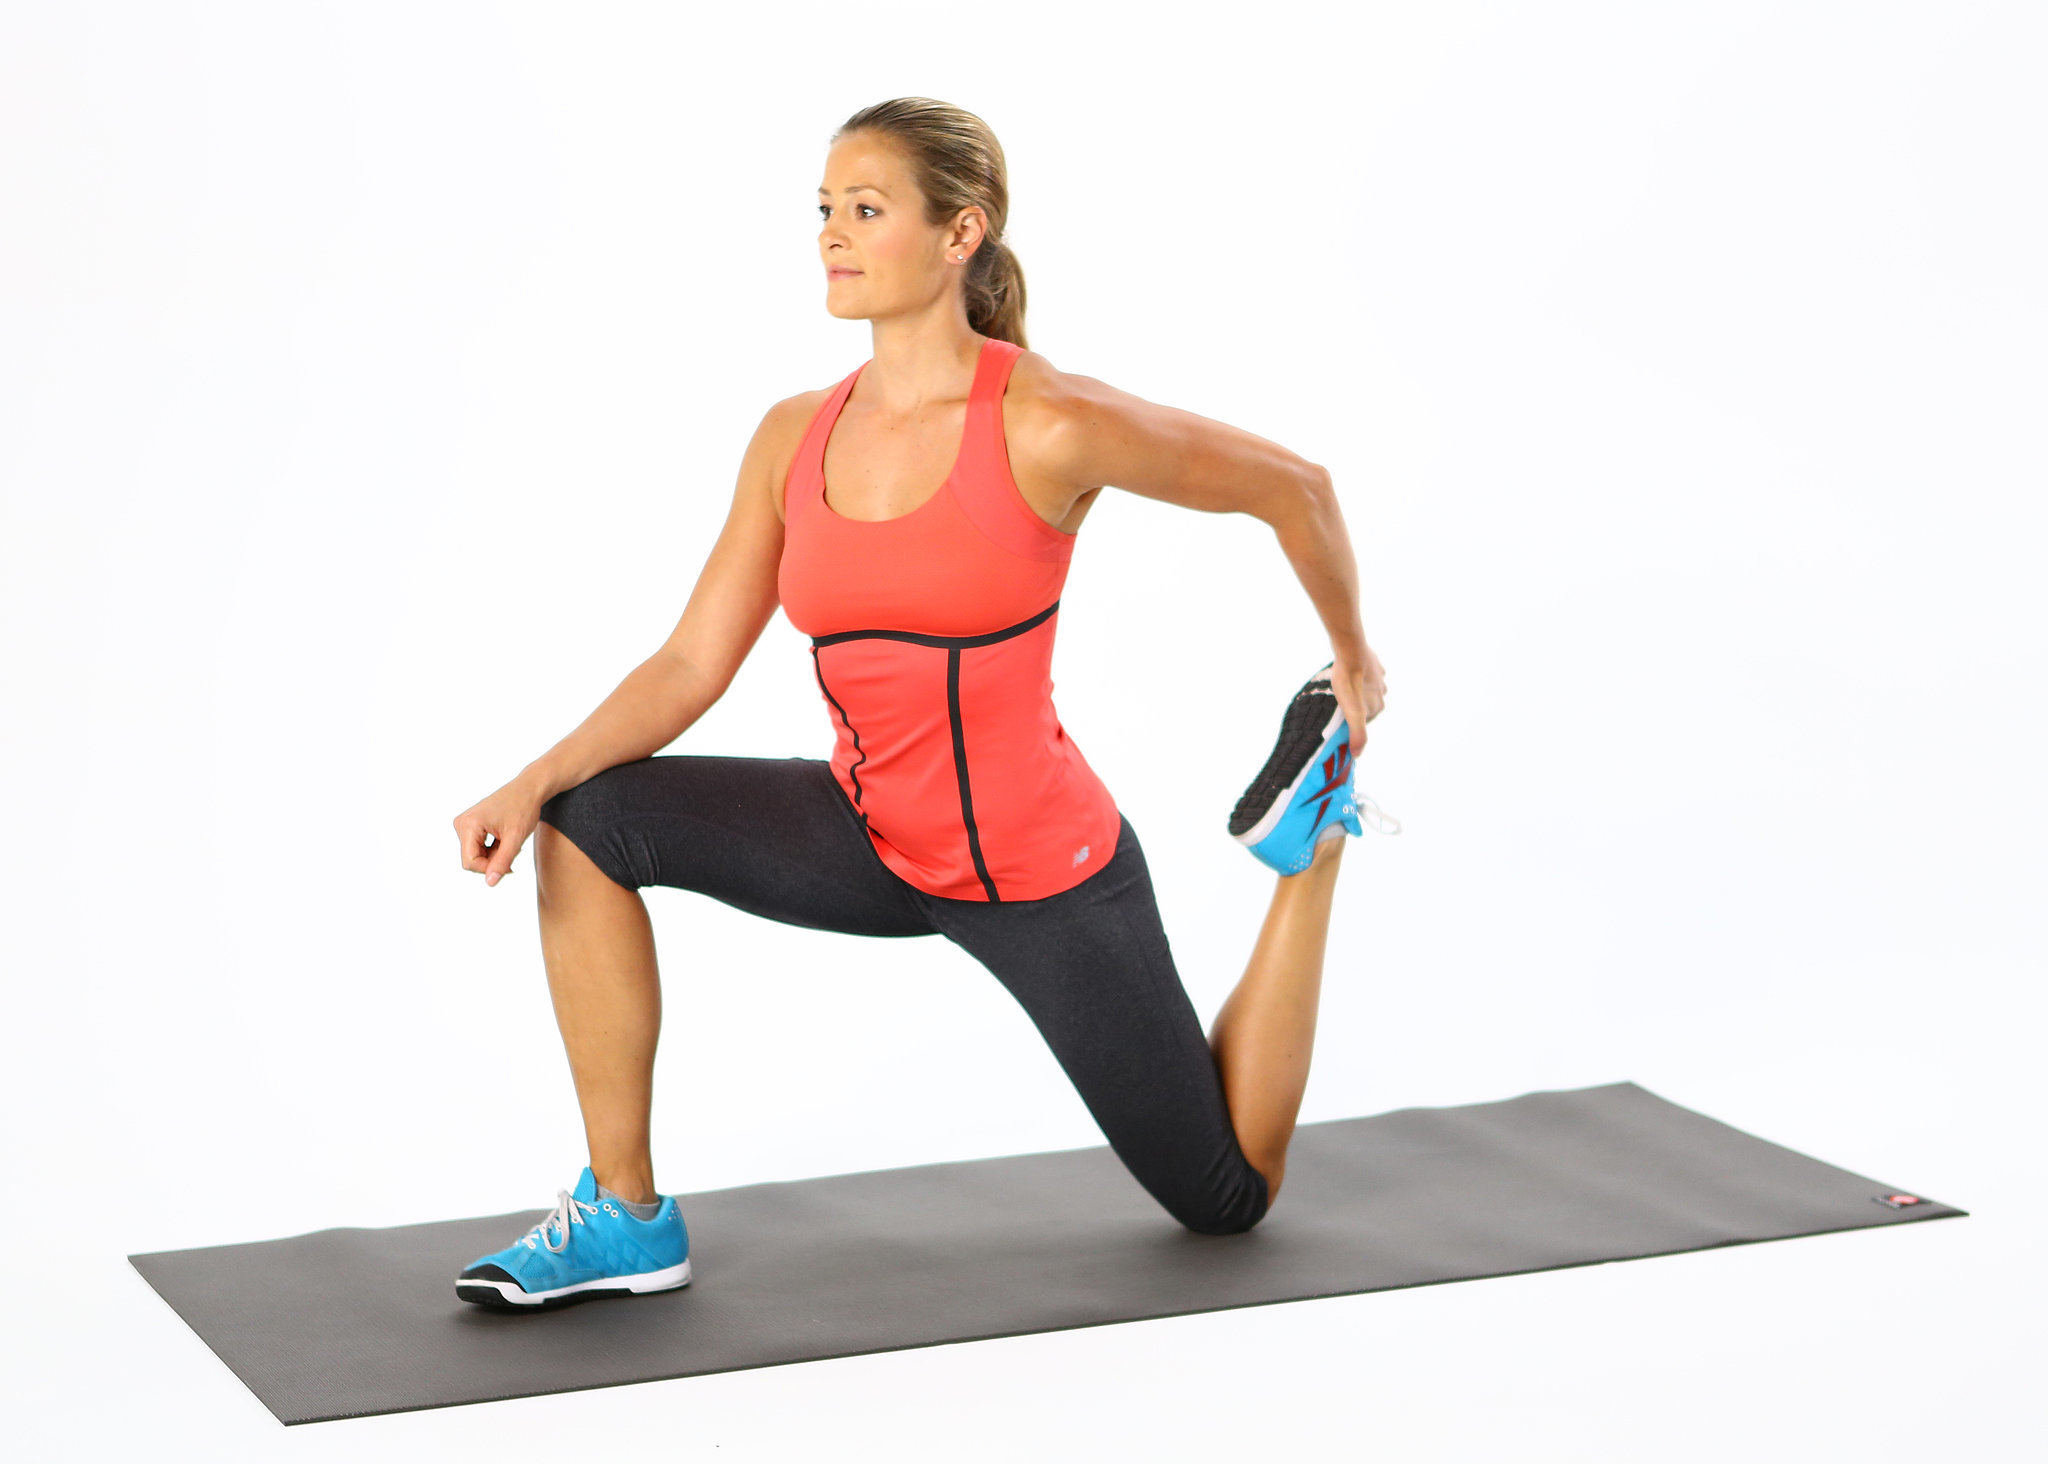
- Start in a lunge position with your left foot forward and your right leg back.
- Lower your right knee to the ground.
- Place your hands on your left knee for support.
- Shift your weight forward until you feel a stretch in the front of your right hip.
- Hold the stretch for 15-30 seconds and release.
- Repeat on the other side.
The Pigeon Pose

The pigeon pose is a yoga pose that stretches the hip flexors and glutes. Here's how to do it:
- Start in a downward-facing dog position.
- Bring your right knee forward and place it behind your right hand.
- Slide your left leg back and straighten it behind you.
- Lower yourself down to the ground, resting on your forearms.
- Hold the stretch for 15-30 seconds and release.
- Repeat on the other side.
Tips for Effective Quad and Hip Flexor Stretching
Here are some tips to keep in mind when stretching your quadriceps and hip flexors:
- Start slow and gentle. Avoid bouncing or jerky movements.
- Hold each stretch for at least 15-30 seconds.
- Breathe deeply and evenly throughout the stretch.
- Stretch regularly, ideally every day.
- Combine stretching with other forms of exercise, such as walking, cycling, or swimming.
Conclusion
Stretching your quadriceps and hip flexors is an important part of maintaining good mobility and reducing the risk of injury. By incorporating these stretches into your daily routine, you can improve your overall flexibility and comfort. Remember to start slow and gentle, and always listen to your body. With patience and consistency, you can enjoy better mobility and a healthier body.
Related video of Quad and Hip Flexor Stretch: A Guide to Better Mobility

If you are looking for an exercise to strengthen your back, shoulders, and arms, you should try the reverse grip dumbbell row. This exercise targets your lats, rhomboids, traps, biceps, and forearms. It also improves your grip strength, posture, and overall upper body stability. In this article, we will show you how to perform the reverse grip dumbbell row correctly, its variations, benefits, and precautions.
How to Perform the Reverse Grip Dumbbell Row

Here are the steps to perform the reverse grip dumbbell row:
- Stand with your feet shoulder-width apart and knees slightly bent.
- Hold a dumbbell in each hand with a neutral grip (palms facing each other).
- Bend forward at your hips while keeping your back straight and chest up.
- Extend your arms fully so that the dumbbells are hanging in front of you.
- Rotate your wrists so that your palms face down (reverse grip).
- Pull the dumbbells towards your ribcage by squeezing your shoulder blades together.
- Pause for a second at the top of the movement and then slowly lower the dumbbells back to the starting position.
- Repeat for the desired number of repetitions.
Make sure to keep your elbows close to your body, and avoid swinging or jerking the weights. Also, exhale as you pull the weights up and inhale as you lower them down.
Reverse Grip Dumbbell Row Variations

Here are some variations of the reverse grip dumbbell row:
- Single-arm reverse grip dumbbell row: Perform the exercise with one arm at a time to increase the challenge and focus on each side of your back separately.
- Incline reverse grip dumbbell row: Perform the exercise on an incline bench to target your upper back and rear delts more effectively.
- T-bar row with reverse grip: Perform the exercise using a T-bar machine to increase the weight and stability.
Reverse Grip Dumbbell Row Benefits

Here are some benefits of the reverse grip dumbbell row:
- Strengthens your back, shoulders, and arms: The exercise targets your upper and middle back, rear delts, biceps, and forearms.
- Improves your posture: The exercise strengthens the muscles that support your spine, which can help you maintain a straight and upright posture.
- Increases your grip strength: The reverse grip challenges your grip more than a regular grip, which can help you in other exercises and daily activities.
- Enhances your overall upper body stability: The exercise trains your scapular muscles, which are essential for shoulder stability and mobility.
- Can prevent or alleviate back pain: The exercise can reduce the risk of lower back pain by strengthening your core and glutes.
Reverse Grip Dumbbell Row Precautions

Here are some precautions to take when performing the reverse grip dumbbell row:
- Choose an appropriate weight: Start with a light weight and gradually increase the load as you get stronger and more comfortable with the movement.
- Avoid rounding your back: Keep your back straight and your core engaged throughout the exercise to avoid straining your lower back.
- Don't lift too high: Avoid lifting the dumbbells above your chest or neck as this can put excessive stress on your shoulders.
- Consult a professional: If you have any pre-existing medical conditions or injuries, consult a doctor or a certified fitness instructor before attempting the exercise.
Conclusion
The reverse grip dumbbell row is a great exercise to strengthen your back, shoulders, and arms. It is easy to perform, versatile, and has many benefits. However, it is important to follow the proper technique, choose an appropriate weight, and take precautions to avoid injuries. Incorporate the reverse grip dumbbell row into your workout routine and enjoy the results!
Related video of Reverse Grip Dumbbell Row: A Complete Guide

One of the best ways to strengthen your biceps is by performing cable bicep curl single arm exercise. This exercise is perfect for those who want to target their biceps individually and want a variation from the standard two-arm curl.
How to Perform Cable Bicep Curl Single Arm
To perform this exercise, you need a cable machine. Follow these steps to perform cable bicep curl single arm:
- Stand in front of the cable machine with your feet shoulder-width apart.
- Grab the handle with one hand and keep your elbow close to your side.
- Slowly curl the cable towards your shoulder while keeping your elbow close to your side.
- Squeeze your bicep at the top of the movement and then slowly lower the cable back down to the starting position.
- Repeat the exercise for the desired number of repetitions and then switch to the other arm.
Make sure to keep your back straight and avoid using momentum to lift the weight. Also, you can adjust the weight according to your strength and fitness level.
The Benefits of Cable Bicep Curl Single Arm

Cable bicep curl single arm exercise is an effective way to target your biceps and improve your overall arm strength. Here are some of the benefits of this exercise:
- It helps to build muscle mass in your biceps and forearms.
- It improves your grip strength and wrist stability.
- It helps to improve your overall arm strength and endurance.
- It helps to prevent muscle imbalances by targeting each arm individually.
- It is a great exercise for those who have a history of shoulder or elbow injuries as it allows for a more natural range of motion.
Precautions and Tips
Before starting cable bicep curl single arm exercise, make sure to warm up your arms and shoulders with some light cardio and stretching. Also, follow these precautions and tips:
- Start with a light weight and gradually increase the weight as you get stronger.
- Avoid swinging your body or using momentum to lift the weight.
- Keep your elbow close to your side throughout the movement.
- Squeeze your bicep at the top of the movement and hold for a few seconds before slowly lowering the weight.
- Avoid locking out your elbow at the bottom of the movement.
- If you experience any pain or discomfort during the exercise, stop immediately and consult with your doctor or physical therapist.
Conclusion
Cable bicep curl single arm exercise is a great way to target your biceps and improve your overall arm strength. It is an easy exercise to perform and can be adjusted to your fitness level. Remember to follow the precautions and tips to avoid any injuries and get the most out of this exercise.
Related video of Cable Bicep Curl Single Arm: How to Perform and Benefits
The half kneeling lat pulldown is an excellent exercise that can help you to build upper body strength and increase your back muscles. This exercise is a variation of the traditional lat pulldown and requires you to be in a half kneeling position. In this article, we will discuss the benefits, proper form, and variations of the half kneeling lat pulldown.
Benefits of the Half Kneeling Lat Pulldown
The half kneeling lat pulldown is a compound exercise that targets multiple muscle groups of the upper body. This exercise focuses on the lats, which are the largest back muscles, but it also engages the shoulders, biceps, and forearms. By performing this exercise regularly, you can:
- Strengthen your back muscles
- Improve your posture
- Increase your pulling strength
- Enhance your grip strength
- Reduce the risk of injury
Proper Form of the Half Kneeling Lat Pulldown

Before performing the half kneeling lat pulldown, it is essential to master the proper form to avoid injury and get the most out of the exercise. Follow these steps to perform the half kneeling lat pulldown:
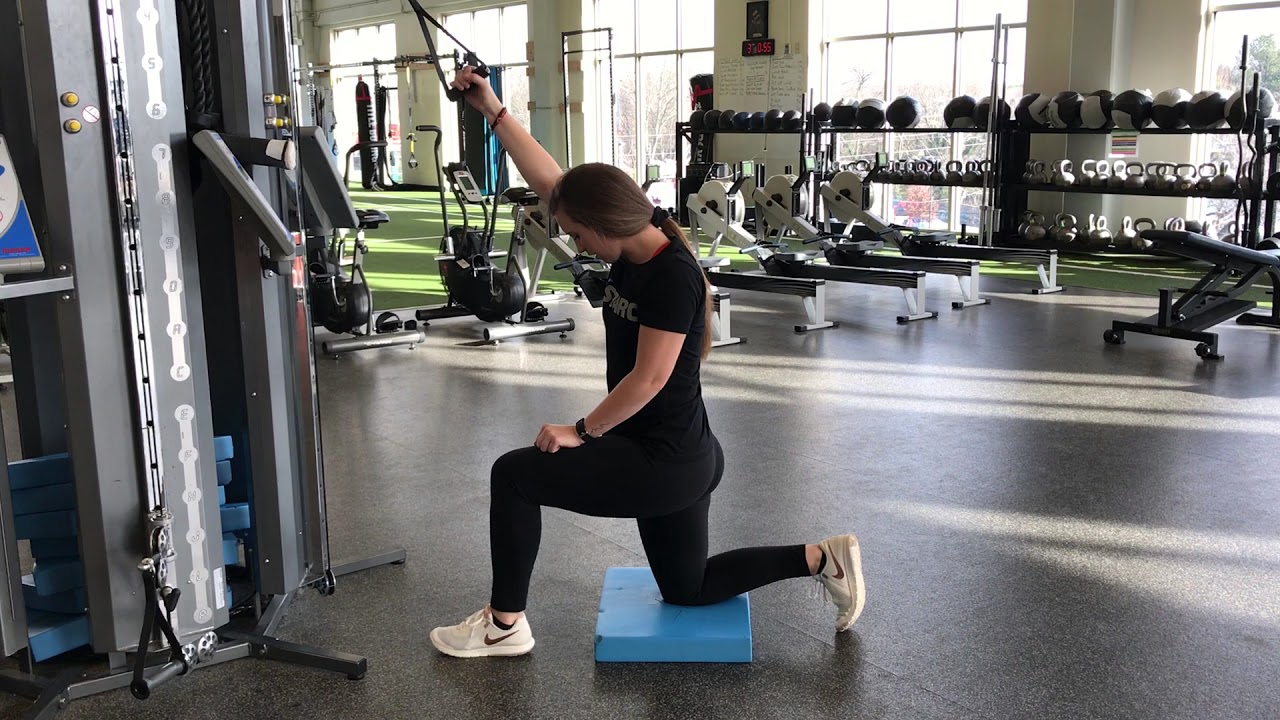
- Attach a lat pulldown bar to a cable machine and set the weight according to your strength level.
- Kneel on one knee in front of the cable machine and place your other foot flat on the ground in front of you.
- Grasp the lat pulldown bar with an overhand grip that is slightly wider than shoulder-width apart.
- Engage your core and keep your back straight throughout the exercise.
- Pull the lat pulldown bar towards your chest while keeping your elbows close to your body.
- Pause for a second and then slowly return the bar to the starting position.
- Repeat the movement for the desired number of repetitions.
- Switch legs and repeat the exercise.
Variations of the Half Kneeling Lat Pulldown

The half kneeling lat pulldown can be modified to increase or decrease the difficulty level or target different muscle groups. Here are some variations of the half kneeling lat pulldown:
- Wide-grip half kneeling lat pulldown: Perform the exercise with a wider grip to target the upper back muscles.
- Narrow-grip half kneeling lat pulldown: Perform the exercise with a narrower grip to target the biceps and forearms.
- Single-arm half kneeling lat pulldown: Perform the exercise with one arm at a time to increase the intensity and focus on each side of the body.
- Assisted half kneeling lat pulldown: Use a resistance band or have a partner assist you with the movement if you are unable to perform the exercise with your body weight.
Conclusion
The half kneeling lat pulldown is a great exercise to add to your upper body workout routine. It targets multiple muscle groups, improves your posture, and reduces the risk of injury. Remember to use proper form and gradually increase the weight to challenge yourself. Try out the different variations to keep your workouts interesting and effective.
Related video of Half Kneeling Lat Pulldown: A Complete Guide

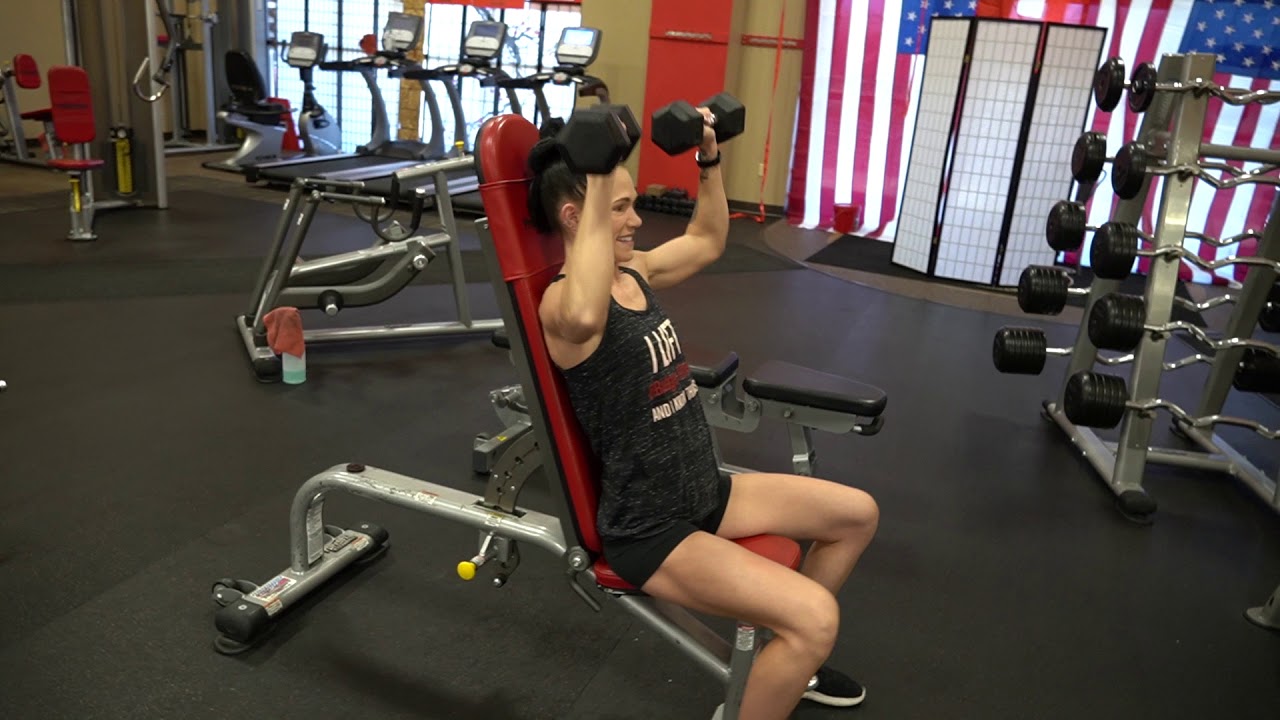
Db Seated Overhead Press, also known as Dumbbell Seated Shoulder Press, is a compound exercise that primarily targets the front and middle deltoids, triceps, and traps. It is a great exercise for building upper body strength, hypertrophy, and power.
Benefits of Db Seated Overhead Press
Db Seated Overhead Press is a great exercise for people of all fitness levels, from beginners to advanced athletes. Here are some of the benefits of doing this exercise:
- Builds upper body strength and power
- Increases shoulder stability and mobility
- Improves posture and alignment
- Boosts overall athletic performance
- Increases bone density and reduces the risk of osteoporosis
- Helps burn fat and build muscle

Technique of Db Seated Overhead Press
Here is how to perform Db Seated Overhead Press:
- Start by sitting on a bench with your feet flat on the ground and your back straight.
- Hold a pair of dumbbells at shoulder height with your palms facing forward.
- Press the dumbbells up and overhead while keeping your elbows close to your body.
- Pause at the top of the movement and then lower the dumbbells back down to shoulder height.
- Repeat for the desired number of reps.
Make sure to keep your core tight and your back straight throughout the movement. Avoid using momentum or arching your back to lift the weights. Use a weight that allows you to perform the exercise with proper form and technique.

Muscles Worked by Db Seated Overhead Press
Db Seated Overhead Press primarily targets the following muscles:
- Front and middle deltoids
- Triceps
- Traps
Additionally, this exercise also engages the following muscles:
- Rhomboids
- Serratus anterior
- Rotator cuff
- Upper back muscles
Variations of Db Seated Overhead Press
Here are some variations of Db Seated Overhead Press:
- Seated Arnold Press: Rotate the hands as you lift the weights up, so that at the top of the movement, your palms are facing forward.
- Seated Alternating Dumbbell Press: Lift one dumbbell at a time, alternating between your left and right arms.
- Seated Dumbbell Press with Twist: Rotate your torso to the left or right as you lift the weights overhead, engaging your oblique muscles.
- Seated Dumbbell Press with Resistance Band: Attach a resistance band to the dumbbells and anchor it to a sturdy object behind you. This will increase the resistance and challenge your muscles even more.

Conclusion
Db Seated Overhead Press is a great exercise for building upper body strength, hypertrophy, and power. By following the proper technique and form, you can engage your shoulders, triceps, and traps, while also improving your posture and alignment. Incorporate this exercise into your workout routine and experience the benefits for yourself.
Related video of Db Seated Overhead Press: Benefits, Technique and Muscles Worked

Are you looking for a powerful arm exercise that targets both your biceps and forearms? Look no further than the alternating standing dumbbell curl. This exercise is a staple in any arm workout routine, and for good reason. It's simple, effective, and can be done almost anywhere.
How to Perform Alternating Standing Dumbbell Curls

To perform alternating standing dumbbell curls, follow these steps:
- Stand with your feet shoulder-width apart, holding a dumbbell in each hand.
- Keep your elbows close to your body and your palms facing forward.
- Slowly curl one dumbbell up towards your shoulder, keeping your elbow stationary.
- Lower the dumbbell back down to the starting position.
- Repeat with the opposite arm.
- Continue to alternate arms for the desired number of reps.
It's important to keep your movements slow and controlled throughout the exercise. Avoid swinging your arms or using momentum to lift the weights.
Variations of Alternating Standing Dumbbell Curls

While the basic alternating standing dumbbell curl is a great exercise on its own, there are several variations that you can incorporate into your workout routine:
- Hammer curls: Instead of keeping your palms facing forward, turn them to face each other for a hammer curl. This variation targets your brachialis muscle.
- Concentration curls: Sit on a bench with your legs spread wide apart. Place your elbow on the inside of your thigh and curl the dumbbell towards your shoulder.
- Preacher curls: Use a preacher curl bench to isolate your biceps and take the strain off your shoulders.
- Incline dumbbell curls: Lie on an incline bench with your arms hanging straight down. Curl the weights towards your shoulders while keeping your elbows close to your body.
The Benefits of Alternating Standing Dumbbell Curls

There are several benefits to incorporating alternating standing dumbbell curls into your workout routine:
- Target multiple muscle groups: Alternating standing dumbbell curls work both your biceps and forearms simultaneously.
- Improve grip strength: Holding heavy weights during this exercise can help improve your grip strength.
- Build muscle mass: When performed consistently, alternating standing dumbbell curls can help you build lean muscle mass in your arms.
- Improve overall arm strength: The exercise is a great way to improve your overall arm strength, which can be beneficial in daily activities like lifting and carrying objects.
Tips for Getting the Most Out of Alternating Standing Dumbbell Curls

Here are some tips to help you get the most out of your alternating standing dumbbell curls:
- Start with a weight that you can comfortably lift for 10-12 reps. Gradually increase the weight as you get stronger.
- Focus on keeping your movements slow and controlled. Avoid using momentum to lift the weights.
- Keep your elbows close to your body throughout the exercise.
- Exhale as you curl the dumbbell towards your shoulder, and inhale as you lower the weight back down.
- Incorporate alternating standing dumbbell curls into a larger arm workout routine for maximum results.
Conclusion

Alternating standing dumbbell curls are a simple yet effective exercise that can help you build lean muscle mass in your arms and improve your overall arm strength. Whether you're a seasoned gym-goer or just starting out, this exercise is a great addition to any arm workout routine.