
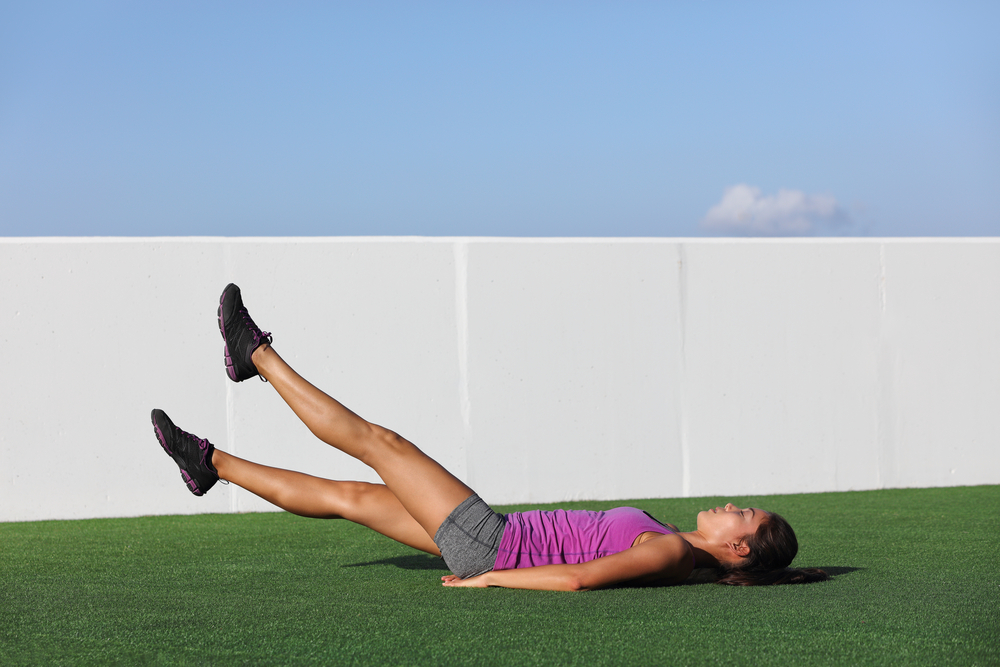
Female hanging leg raises are an excellent exercise for strengthening your core and lower body. This exercise involves hanging from a pull-up bar or any other stable structure and raising your legs in a controlled manner. If you're looking to tone your abs, improve your balance, and increase your overall strength, this exercise is perfect for you. In this article, we'll discuss everything you need to know about female hanging leg raises.
How to Do Female Hanging Leg Raises
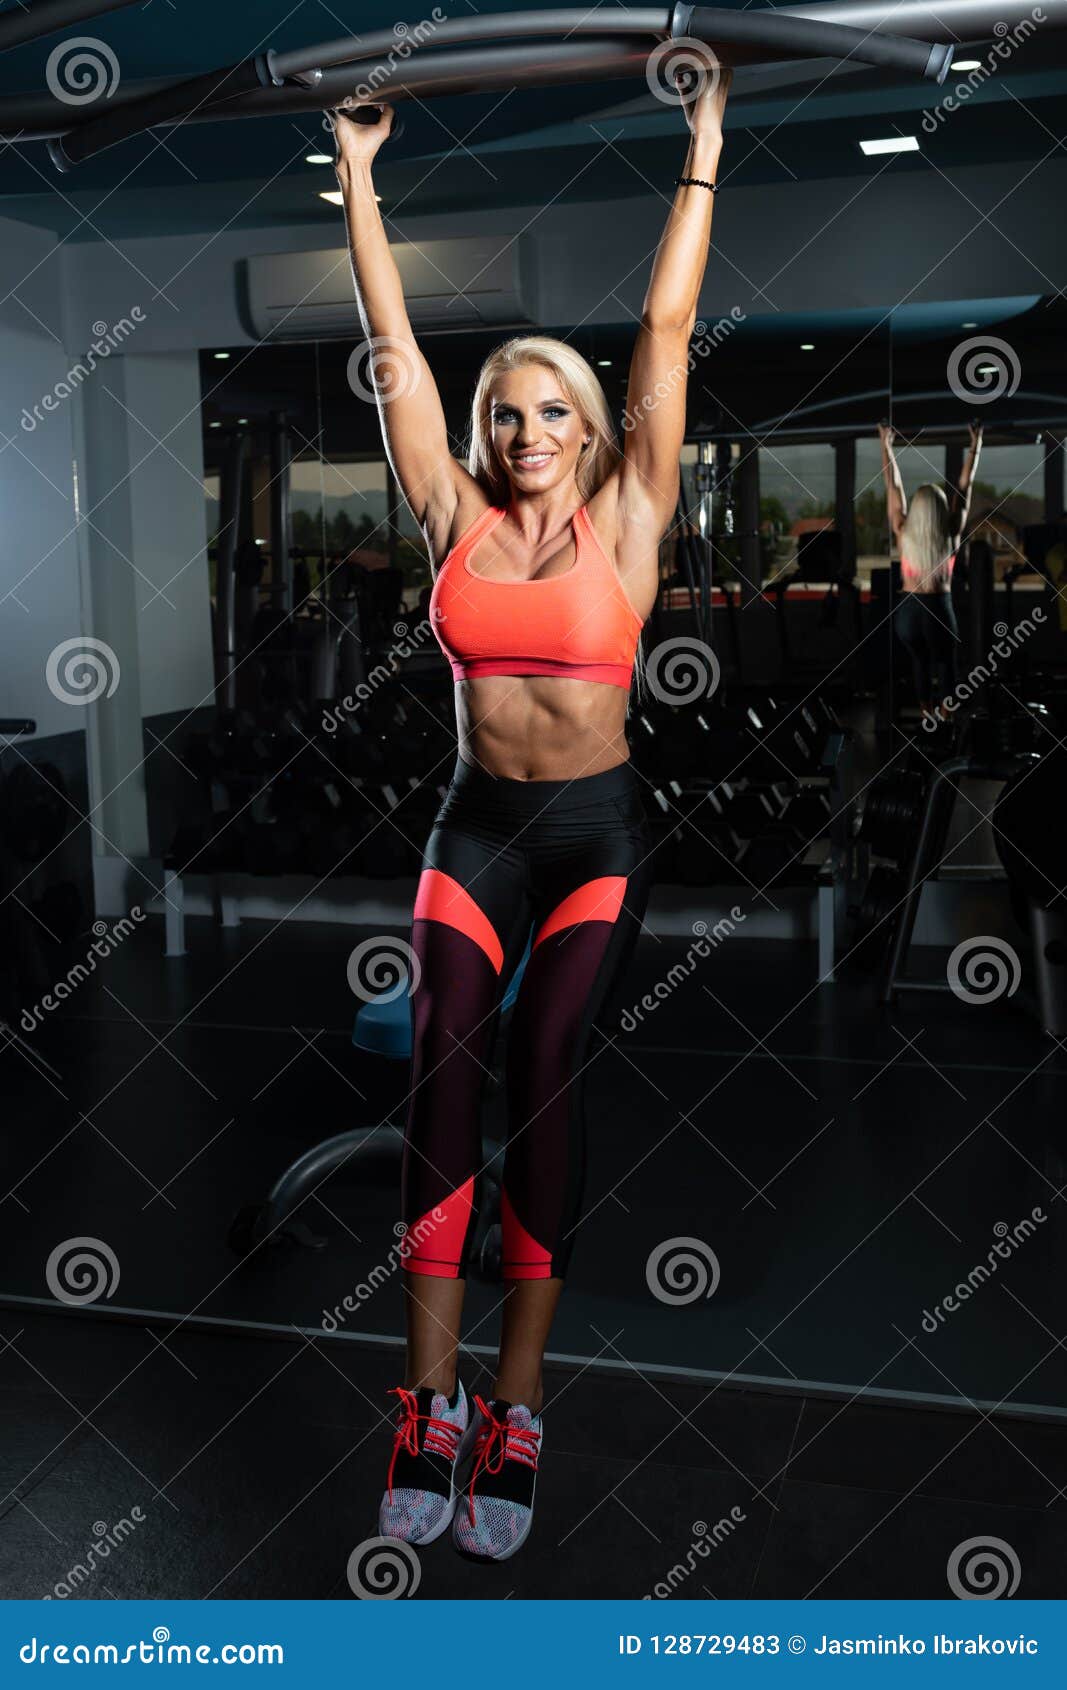
Before you start doing female hanging leg raises, it's essential to know the proper form. Here's how to do it:
- Hang from a pull-up bar or any other stable structure with your arms extended.
- Engage your core muscles and keep your legs straight.
- Slowly lift your legs until they reach a 90-degree angle with your body.
- Hold this position for a few seconds.
- Slowly lower your legs back to the starting position.
- Repeat the exercise for the desired number of repetitions.
It's essential to maintain control throughout the exercise, and avoid swinging or using momentum to lift your legs. You can also try different variations of this exercise, such as raising your legs to the side or keeping your legs straight and lifting them up and down.
Benefits of Female Hanging Leg Raises

Female hanging leg raises provide numerous benefits, including:
- Strengthening your core muscles, including the rectus abdominis, obliques, and lower back muscles.
- Improving your balance and stability.
- Toning your abs and legs.
- Increasing your overall strength and endurance.
- Reducing the risk of back pain and injury.
If you're looking to improve your overall fitness and strength, adding female hanging leg raises to your workout routine is an excellent idea.
Tips for Doing Female Hanging Leg Raises

If you're new to female hanging leg raises, it's essential to start slowly and focus on maintaining proper form. Here are some tips to help you get started:
- Start with a few repetitions and gradually increase the number as you get stronger.
- Keep your core muscles engaged throughout the exercise.
- Avoid swinging or using momentum to lift your legs.
- Breathe in as you lift your legs and exhale as you lower them.
- Use a spotter or a resistance band to assist you if needed.
By following these tips, you can ensure that you're doing female hanging leg raises safely and effectively.
Conclusion
Female hanging leg raises are an excellent exercise for improving your core strength, balance, and overall fitness. By following the proper form and gradually increasing the number of repetitions, you can reap the benefits of this exercise and achieve your fitness goals. Remember to start slowly, focus on maintaining proper form, and consult with a fitness professional if you have any concerns or questions.
Related video of Female Hanging Leg Raises: A Comprehensive Guide

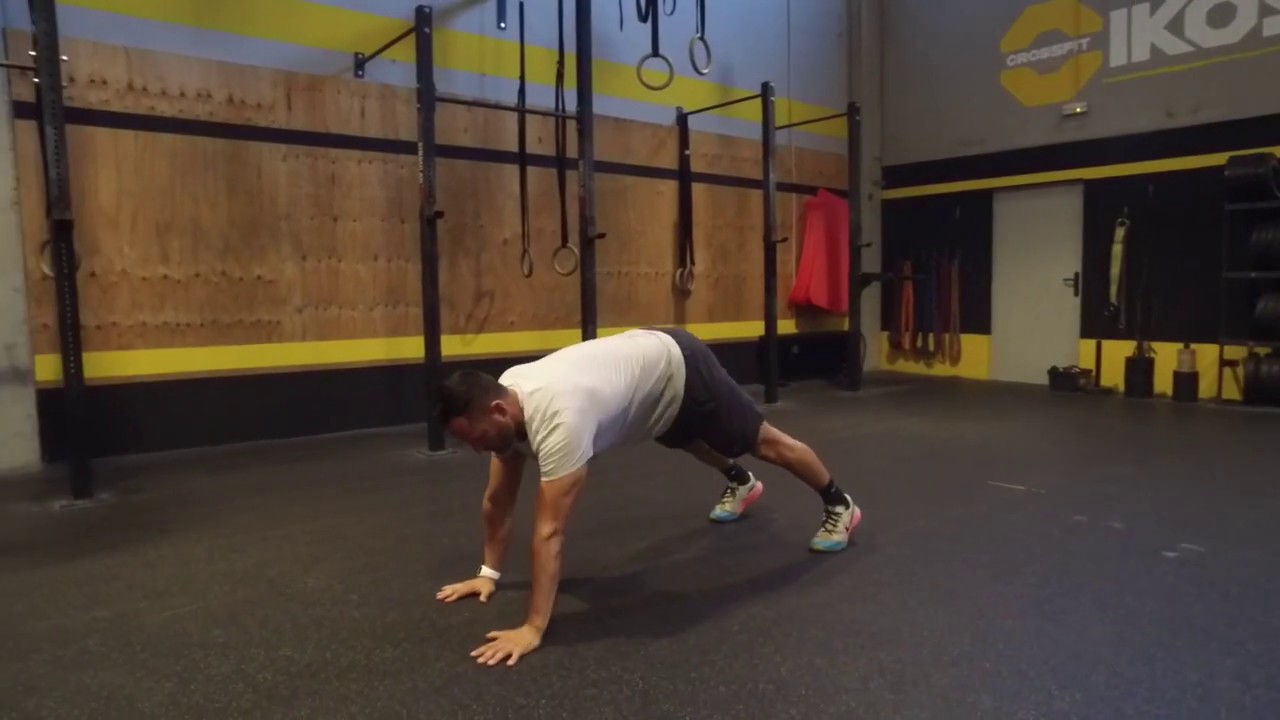
A walkout is a form of protest where a group of people, usually employees or students, leave their workplace or school in a collective and organized manner. Walkouts are usually done to express dissatisfaction with a particular issue or to demand change.
Types of Walkouts

There are different types of walkouts, and they vary depending on the context and the purpose of the protest. Below are some of the most common types:
Strike

A strike is a walkout done by employees to demand better working conditions, higher pay, or other benefits. Strikes are usually organized by labor unions and can last for several days or weeks.
Student Walkout

A student walkout is a form of protest done by students to demand change in their school or community. Student walkouts are usually done to protest issues such as gun violence, racism, or climate change.
Political Walkout
A political walkout is a form of protest done by politicians or political groups to express their dissatisfaction with a particular policy or decision. Political walkouts can be done in different forms, such as boycotting a vote or leaving a meeting.
History of Walkouts

Walkouts have been used as a form of protest for centuries. Below are some of the most notable walkouts in history:
The Boston Tea Party
The Boston Tea Party was a political protest done by American colonists in 1773. The colonists, who were unhappy with the British government's tax on tea, dumped 342 chests of tea into the Boston Harbor as a form of protest.
The Montgomery Bus Boycott

The Montgomery Bus Boycott was a civil rights protest done by African Americans in Montgomery, Alabama, in 1955. The protest was done to protest the segregation of buses in the city and lasted for 381 days.
The Stonewall Riots

The Stonewall Riots were a series of protests done by members of the LGBTQ+ community in New York City in 1969. The riots were done to protest the police raid of the Stonewall Inn, a popular gay bar in the city.
Impact of Walkouts

Walkouts can have a significant impact on society and can lead to change. Below are some of the impacts of walkouts:
Change in Policies

Walkouts can lead to changes in policies or laws. For example, the Montgomery Bus Boycott led to the end of segregation on buses in Montgomery, Alabama.
Raise Awareness

Walkouts can also raise awareness about a particular issue. For example, the student walkouts done in the aftermath of the Parkland shooting raised awareness about gun violence and led to a national conversation about gun control.
Inspire Change

Walkouts can also inspire change in other parts of the world. For example, the Stonewall Riots inspired the LGBTQ+ movement around the world and led to the decriminalization of homosexuality in many countries.
Conclusion
Walkouts are a powerful form of protest that can lead to change and raise awareness about important issues. From the Boston Tea Party to the Stonewall Riots, walkouts have been used as a form of protest throughout history to demand change and fight for justice.
Related video of What Is A Walk Out
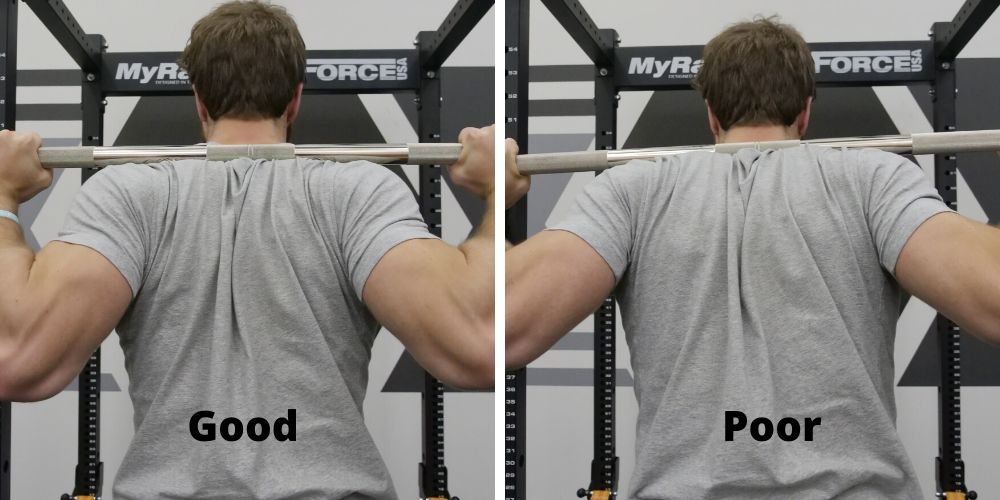
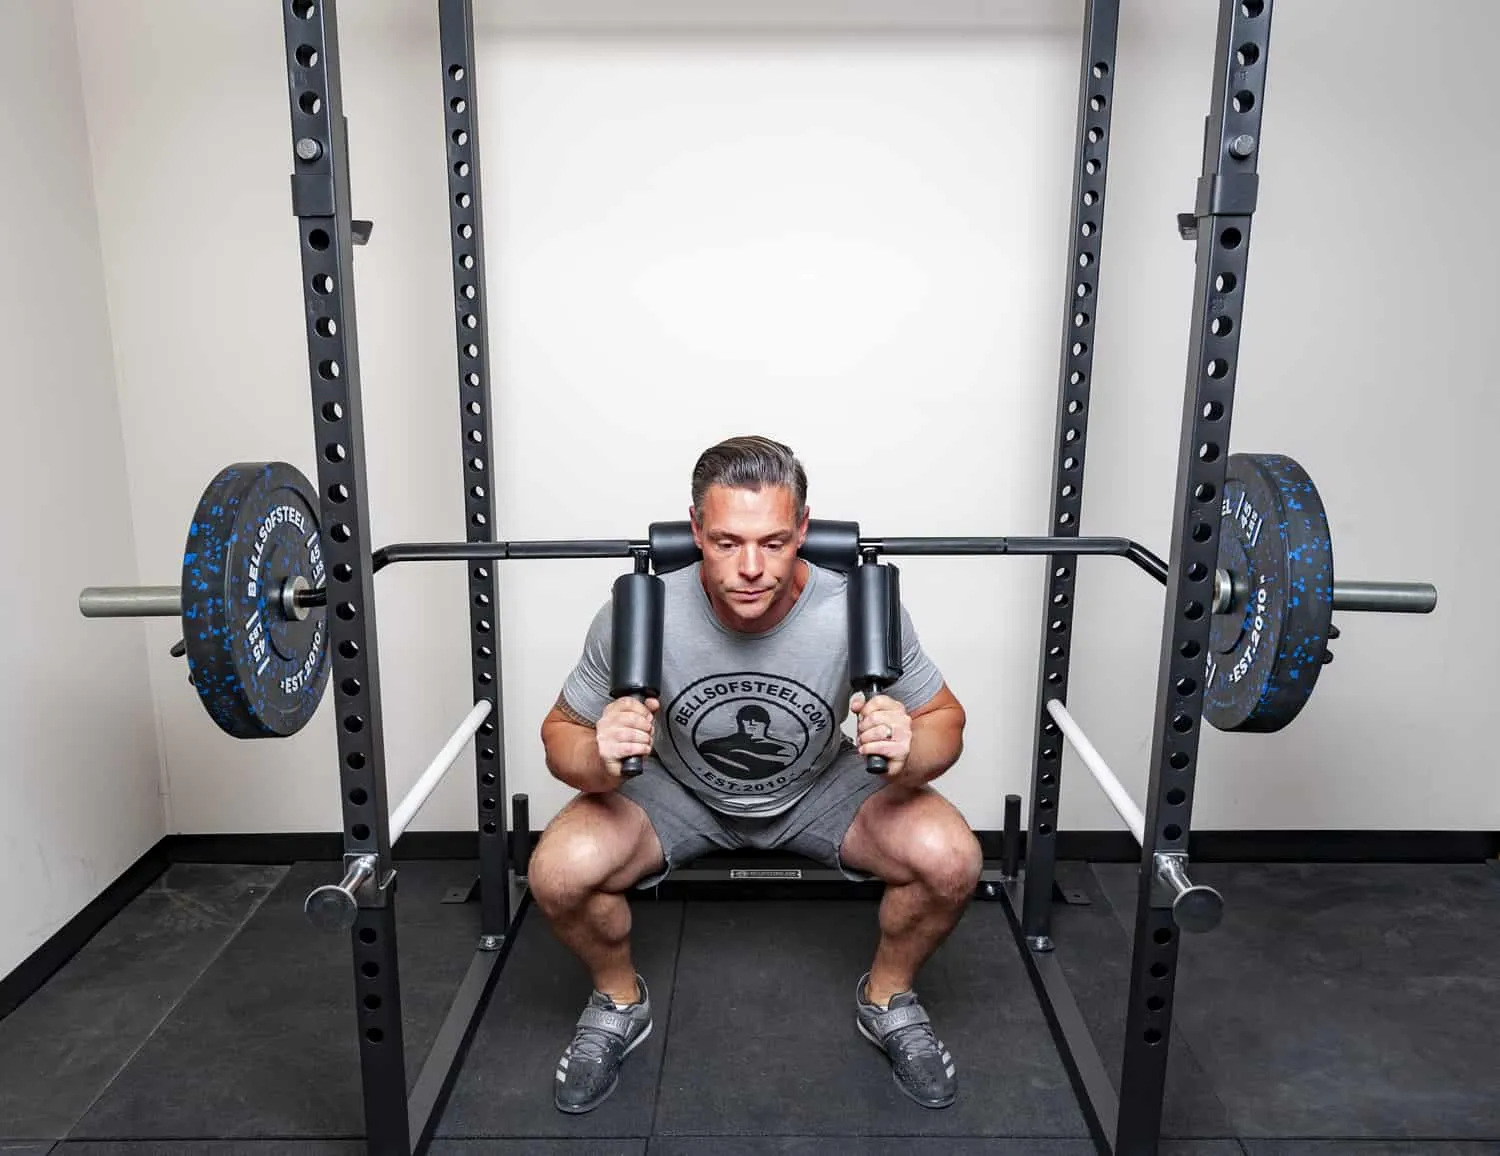
One of the most popular exercises in the gym is the squat. It is an exercise that targets the lower body and is known for its effectiveness in building muscle mass and strength. However, not everyone knows where to place the bar when doing squats. In this article, we will discuss the different options for bar placement and their benefits.
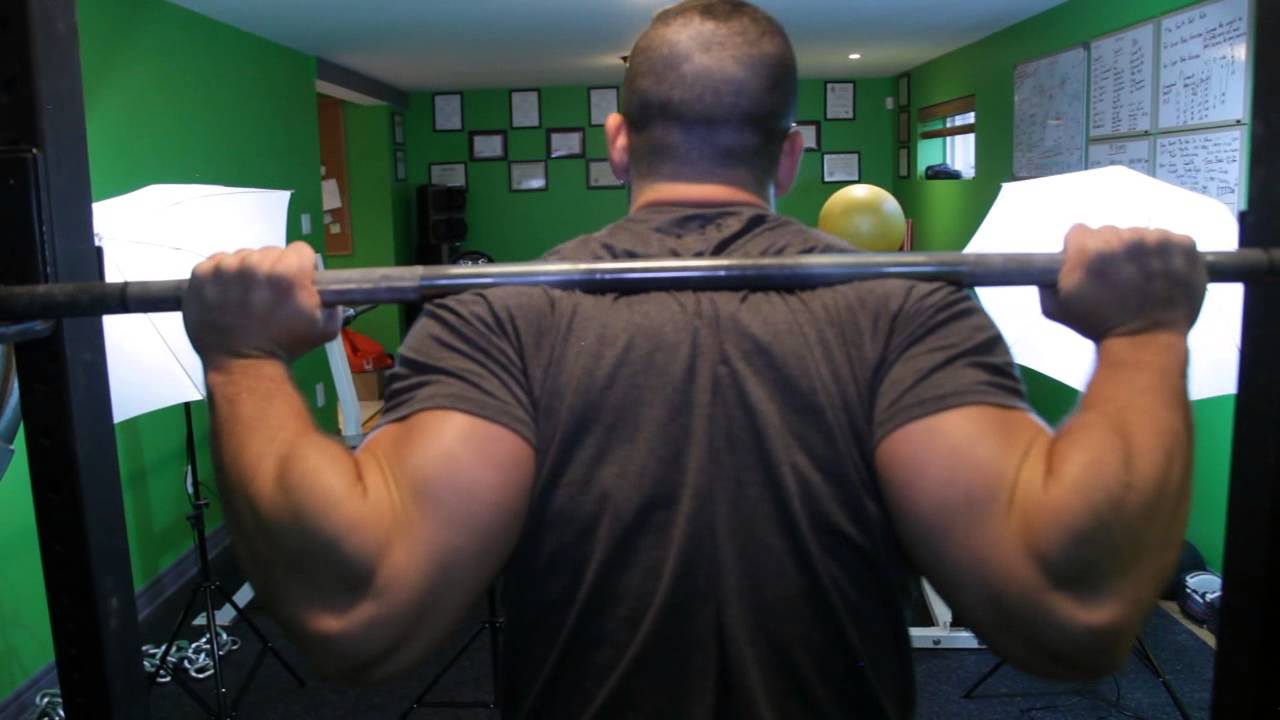
High Bar Squat
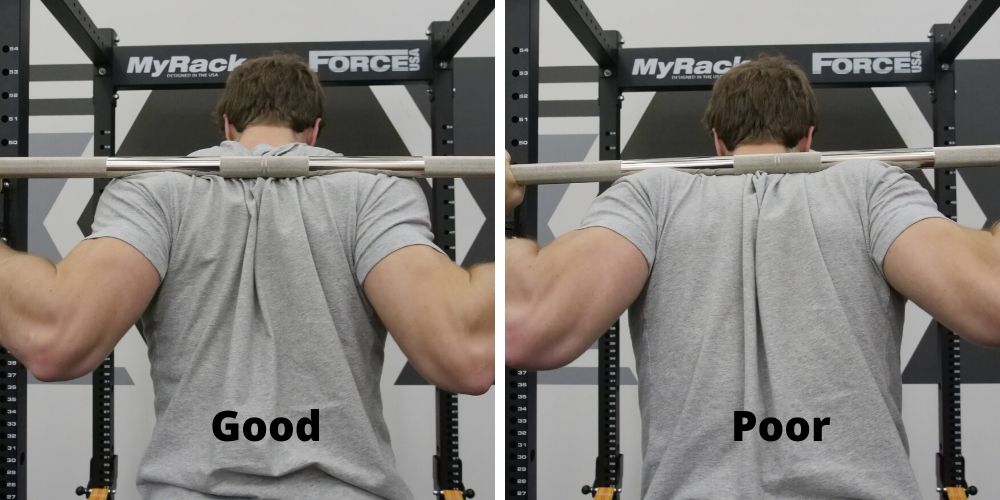
The high bar squat is the most common type of squat. This is where the bar is placed on the upper traps, just below the base of the neck. This position allows for a more upright posture, and places more emphasis on the quads. This is a great option for those who want to build bigger quads.
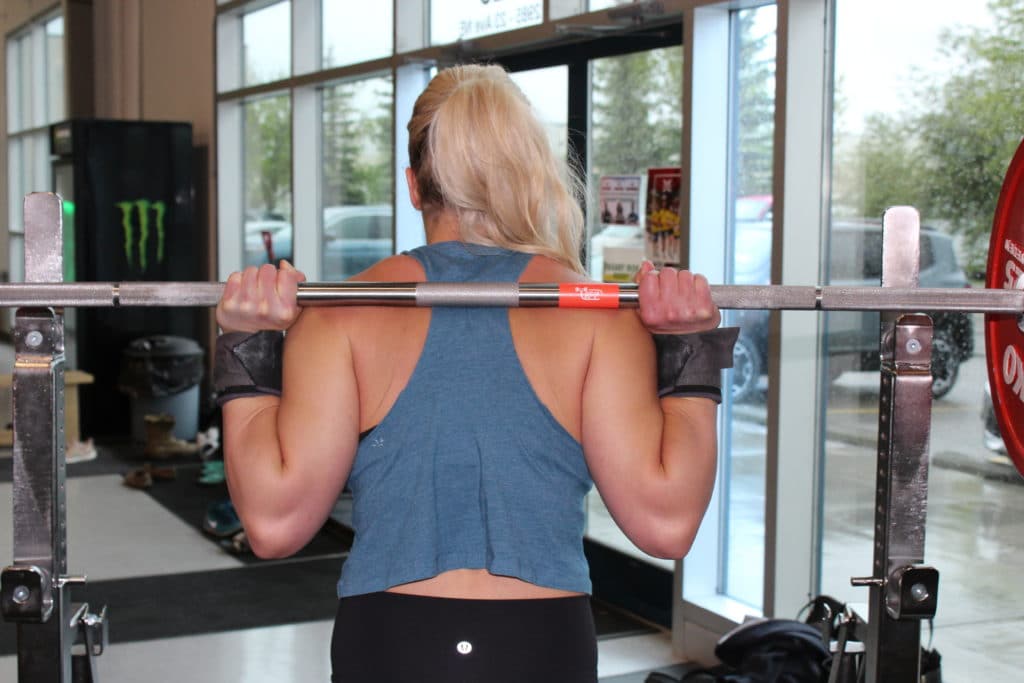
Low Bar Squat
The low bar squat is where the bar is placed on the rear delts, just below the spine of the scapula. This position places more emphasis on the posterior chain, which includes the glutes, hamstrings, and lower back. This position also allows for greater hip involvement, which is beneficial for those who want to build stronger hips.
Front Squat
The front squat is where the bar is placed on the front of the shoulders, with the elbows pointing forward. This position places more emphasis on the quads, and requires greater core stability. This is a great option for those who want to build stronger quads and core stability.
Overhead Squat
The overhead squat is where the bar is placed overhead, with the arms fully extended. This position requires great shoulder mobility and core stability. This is a great option for those who want to improve their overall mobility and stability.
Zercher Squat

The Zercher squat is where the bar is placed in the crook of the elbows. This position places more emphasis on the quads and upper back. This is a great option for those who want to build bigger quads and a stronger upper back.
Conclusion
When it comes to squatting, there are many different options for bar placement. Each option has its own benefits, and it ultimately comes down to personal preference and goals. Whether you want to build bigger quads, a stronger posterior chain, or improve your overall mobility and stability, there is a squat variation that can help you achieve your goals.
Related video of Where To Place Bar For Squats
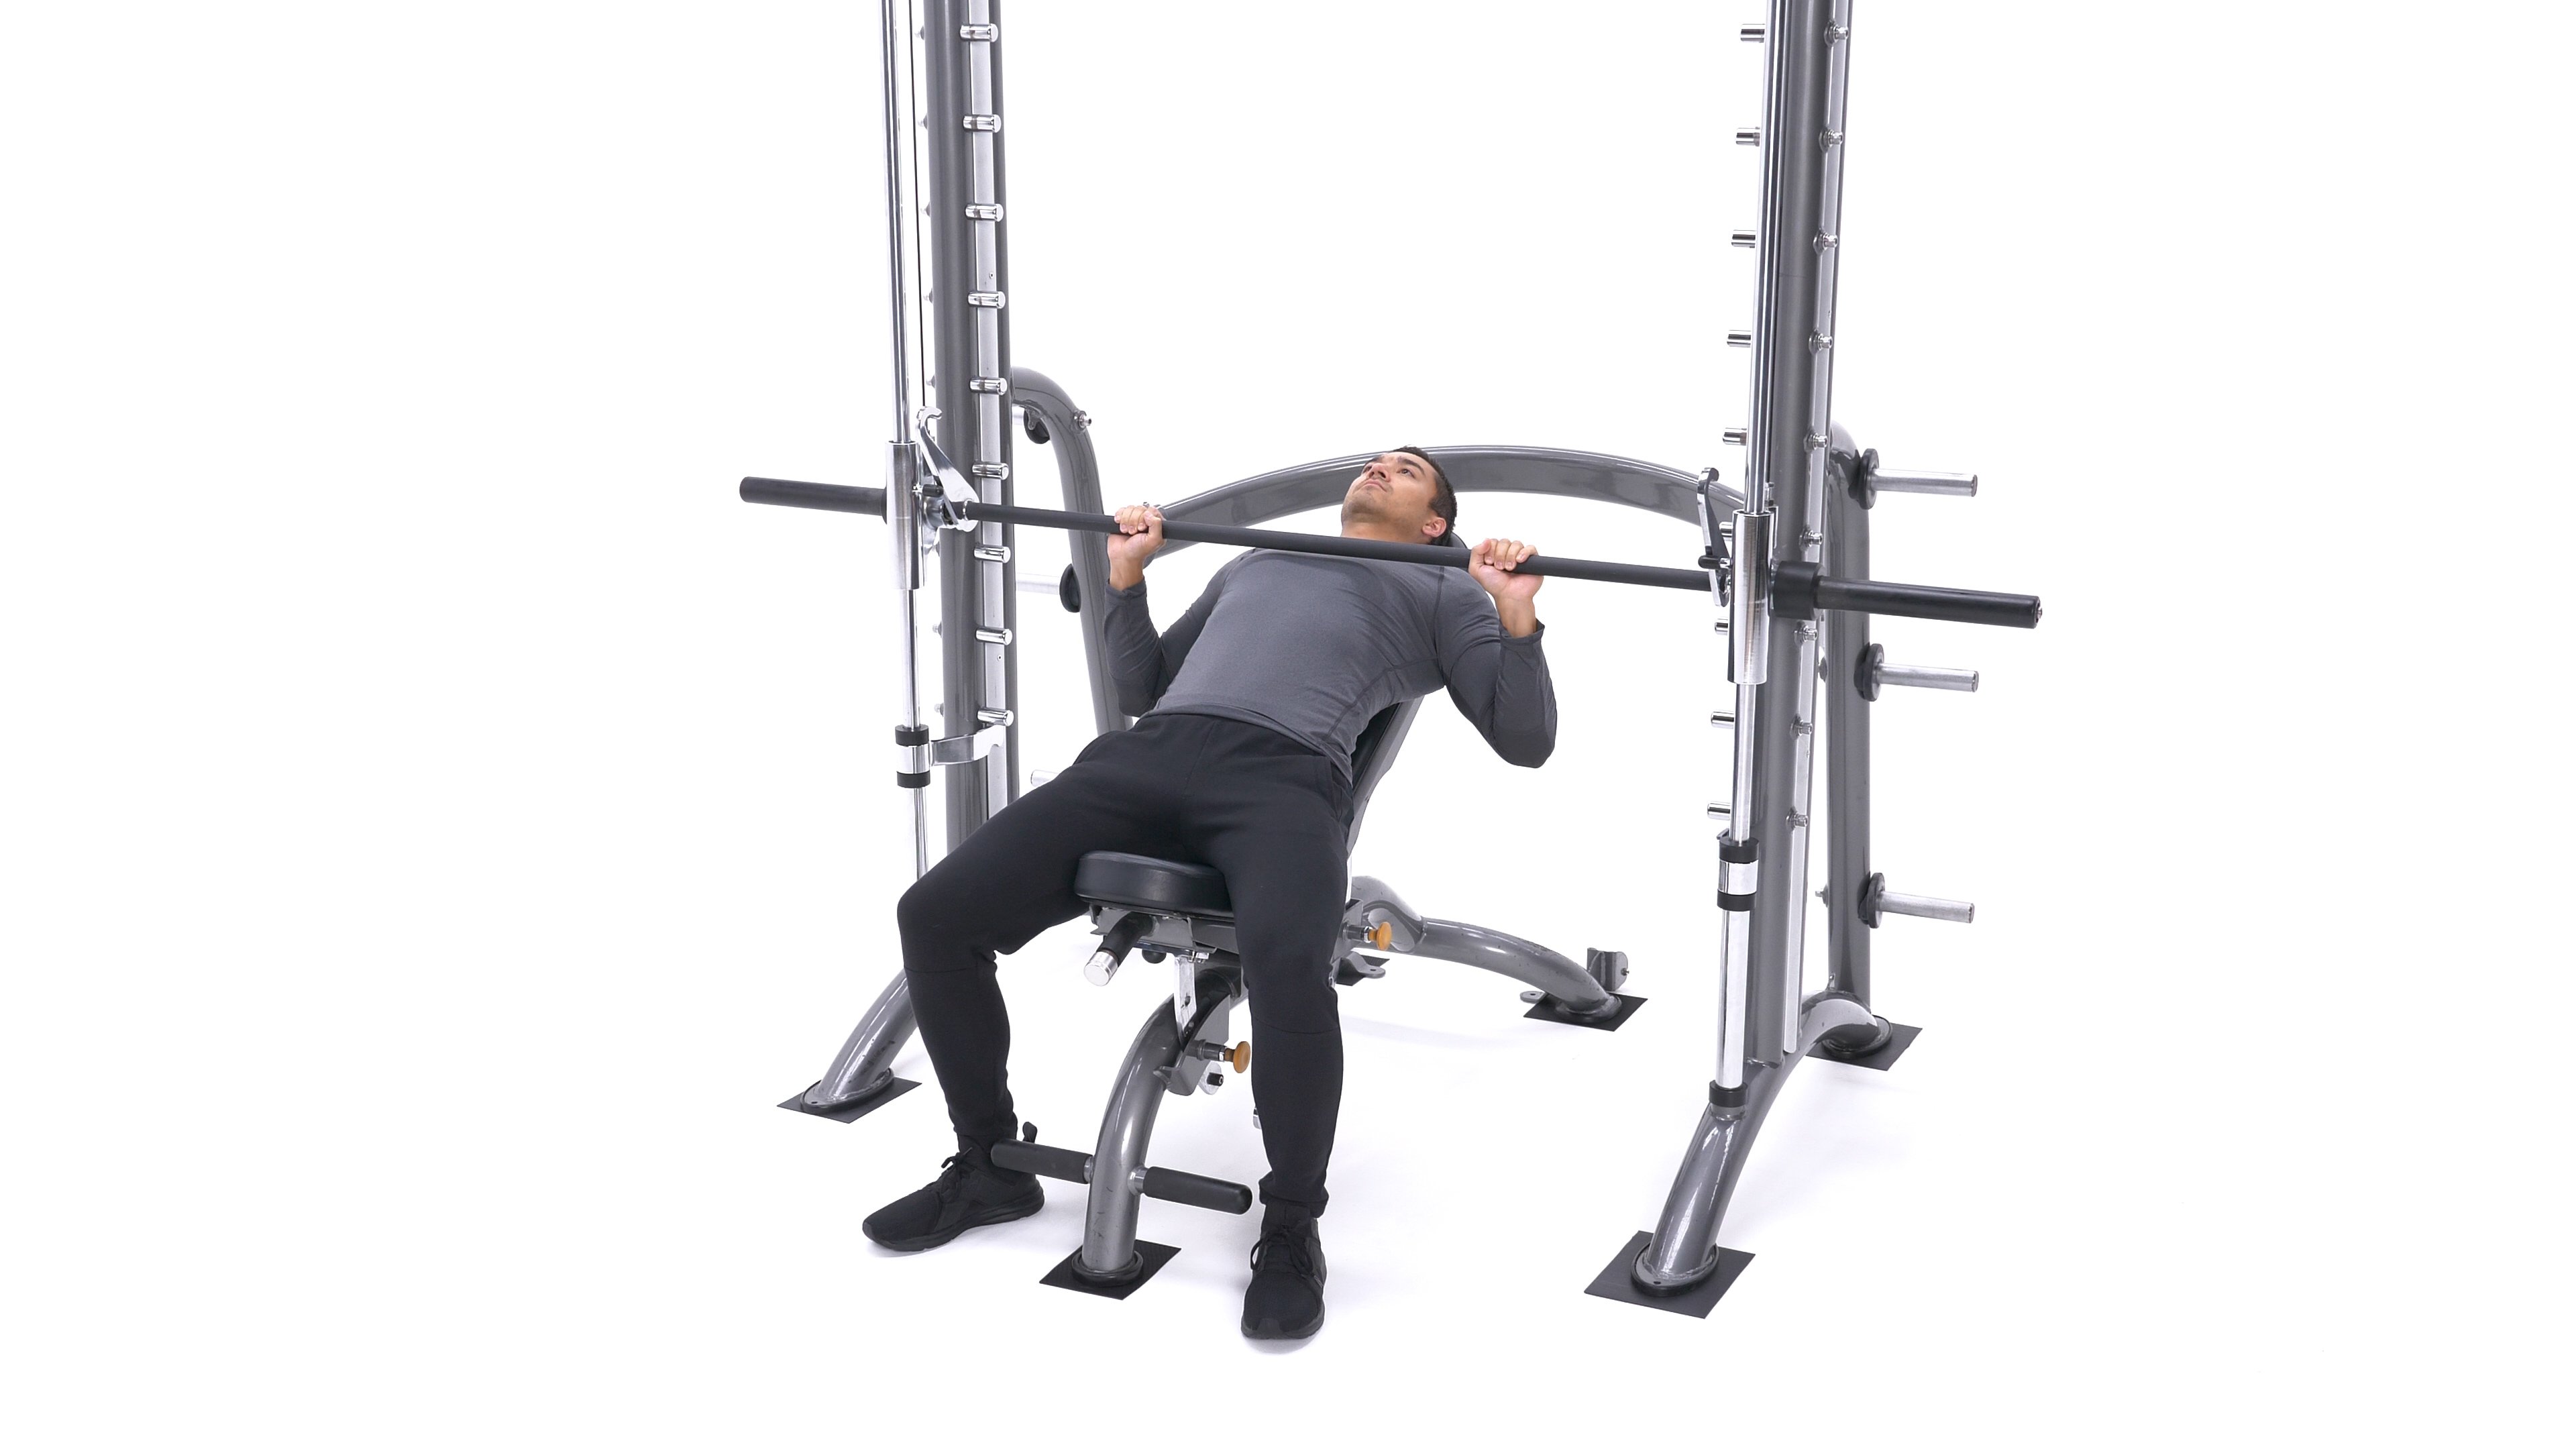
Smith machine incline press is a popular exercise that targets the upper chest muscles while also engaging the triceps and shoulders. This machine is a variation of the traditional incline barbell press, but with added stability and safety features.
What is a Smith Machine Incline Press?
The Smith machine is a piece of equipment that consists of a barbell attached to a vertical track. The barbell is fixed in place, allowing for horizontal movement while maintaining a vertical plane of motion. This feature makes it easier to target specific muscles and reduces the risk of injury.
In a Smith machine incline press, the user adjusts the bench to a 30-45 degree angle and sets the barbell at the desired height. The user then lies down on the bench, grasps the barbell with an overhand grip, and presses it upwards until the arms are fully extended.
Benefits of the Smith Machine Incline Press

The Smith machine incline press offers several benefits:
- Increased muscle activation: The incline angle targets the upper chest muscles, which are often neglected in traditional flat bench presses.
- Improved safety: The fixed barbell reduces the risk of injury by preventing the bar from falling or slipping out of the user's hands.
- Greater stability: The Smith machine provides a stable platform for the user to press from, allowing for greater control and focus on the targeted muscle groups.
- Increased variety: The Smith machine incline press is a great variation to traditional barbell presses, providing increased muscle activation and targeting different areas of the chest.
How to Perform a Smith Machine Incline Press

Follow these steps to perform a Smith machine incline press:
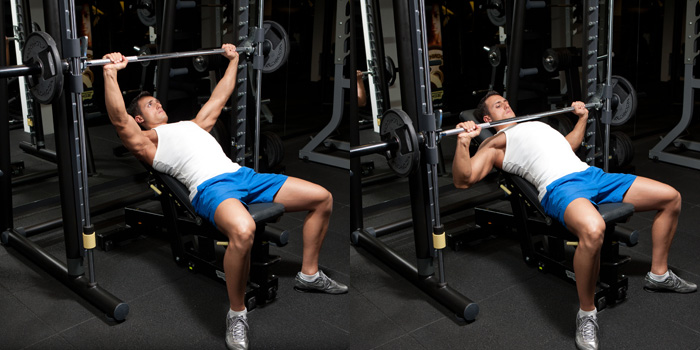
- Adjust the bench to a 30-45 degree angle and set the barbell at the desired height.
- Lie down on the bench and grasp the barbell with an overhand grip, hands slightly wider than shoulder-width apart.
- Unrack the barbell and lower it slowly towards your upper chest, keeping your elbows tucked in.
- Pause briefly at the bottom of the movement, then press the barbell back up until your arms are fully extended.
- Repeat for the desired number of repetitions.
Tips for a Successful Smith Machine Incline Press

Here are some tips to help you perform a successful Smith machine incline press:
- Maintain proper form: Keep your back flat on the bench, feet firmly planted on the ground, and elbows tucked in towards your body.
- Use a controlled tempo: Lower the barbell slowly and with control, pausing briefly at the bottom of the movement before pressing back up.
- Focus on your breathing: Inhale as you lower the barbell and exhale as you press it back up.
- Gradually increase weight: Start with a lighter weight and gradually increase as you become more comfortable and confident with the exercise.
Alternative Exercises

If you don't have access to a Smith machine, or if you're looking to mix up your chest workout, here are some alternative exercises:
- Incline barbell press: This exercise is similar to the Smith machine incline press, but uses a traditional barbell instead of a fixed barbell.
- Dumbbell incline press: This exercise involves lying on an incline bench and pressing dumbbells upwards, targeting the upper chest muscles.
- Chest fly: This exercise involves lying on a flat bench and using dumbbells to perform a fly motion, targeting the chest muscles.
Conclusion
The Smith machine incline press is a great exercise for targeting the upper chest muscles while also engaging the triceps and shoulders. It offers increased stability and safety features, making it an excellent choice for beginners or those with limited experience with barbell exercises. By following proper form and gradually increasing weight, you can make significant progress in your chest workout and achieve your fitness goals.
Related video of Smith Machine Incline Press: The Ultimate Guide

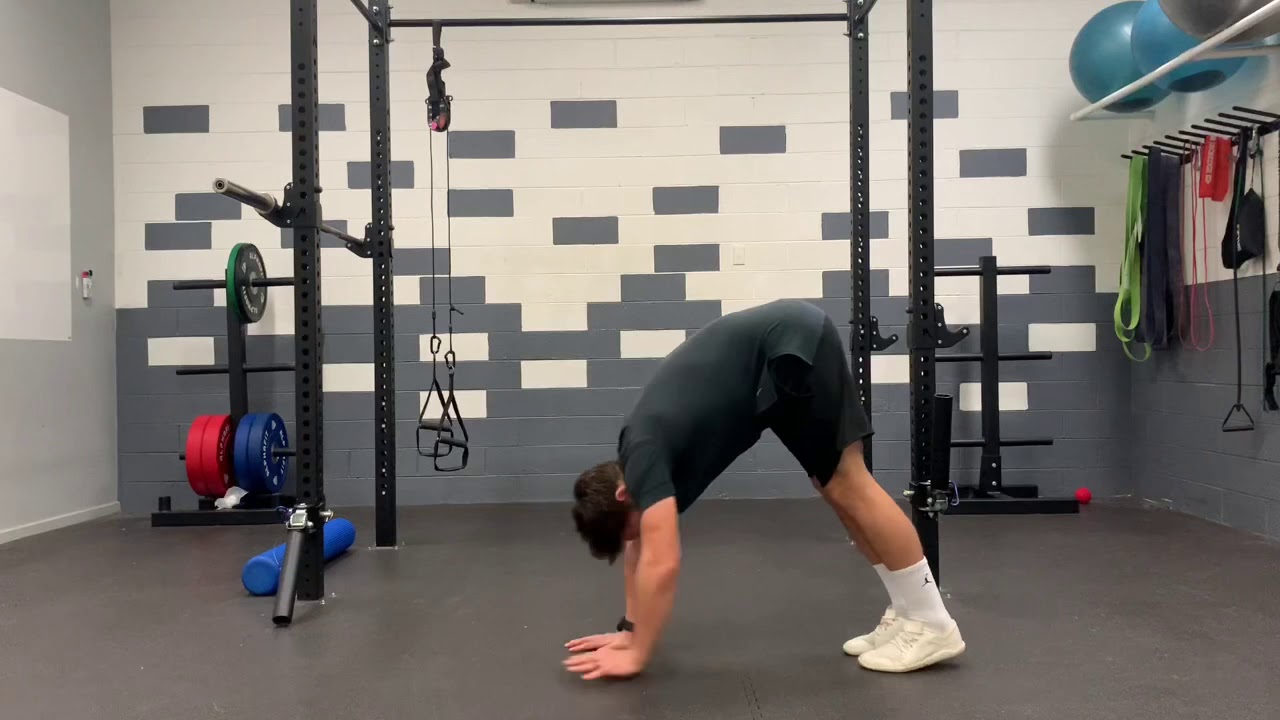
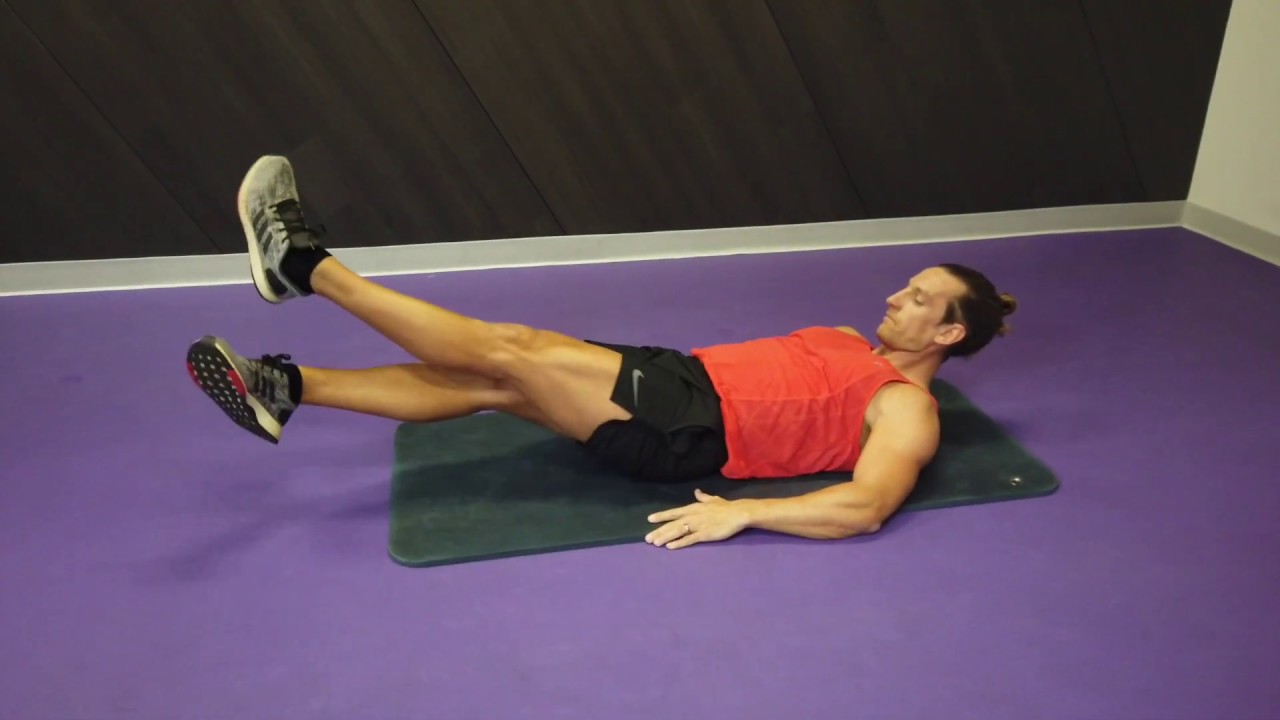
A scissor kick is a popular move in soccer, martial arts, and other sports. It is a type of kick where you jump, spread your legs apart, and then bring them back together in a scissor-like motion. This move can be used to kick the ball or to execute a move on an opponent. If you want to learn how to do a scissor kick, you're in the right place. In this article, we'll go over the steps you need to take to master this move.
Step 1: Warm Up

Before you start practicing the scissor kick, make sure you warm up properly. This will help prevent injury and ensure that your muscles are ready for the workout. Some good warm-up exercises include jogging, jumping jacks, and stretching.
Step 2: Master the Basic Jump

The scissor kick requires a lot of jumping, so it's important to master the basic jump before moving on. Start by standing with your feet shoulder-width apart and your arms at your sides. Then, bend your knees and jump up, using your arms to help propel you into the air. Land softly on the balls of your feet and repeat the jump several times.
Step 3: Practice the Scissor Motion

Once you've mastered the basic jump, it's time to practice the scissor motion. Stand with your feet together and your arms at your sides. Then, jump up and spread your legs apart, one to the front and one to the back. As you do this, swing your arms in the opposite direction, with one arm going forward and the other going back. Then, jump again and bring your legs back together while swinging your arms back to their starting position.
Step 4: Combine the Jump and Scissor Motion
Now that you've practiced the basic jump and the scissor motion, it's time to combine the two. Start by jumping up and spreading your legs apart in the scissor motion. As you do this, swing your arms in the opposite direction. Then, jump again and bring your legs back together while swinging your arms back to their starting position. Repeat this motion several times until you feel comfortable with it.
Step 5: Add the Kick

Once you've mastered the scissor motion, it's time to add the kick. Start by jumping up and spreading your legs apart in the scissor motion. As you bring your legs back together, kick the ball with the foot that was in front. This will require some practice to get the timing right, so don't get discouraged if you don't get it on the first try.
Step 6: Practice, Practice, Practice
The key to mastering the scissor kick is to practice it as much as possible. Set up some cones or use a wall to practice kicking the ball back and forth. Try different variations of the scissor kick, such as the reverse scissor kick, to keep things interesting.
Step 7: Tips for Success

Here are some tips to help you succeed with the scissor kick:
- Stay focused: Concentrate on the ball and stay focused on your goal.
- Keep your eyes on the ball: This will help you make solid contact with the ball.
- Use your arms: Swing your arms to help you jump higher and control your balance.
- Practice with a partner: Have a friend or coach help you practice the scissor kick.
Conclusion
The scissor kick is a great move to have in your arsenal, whether you're playing soccer or martial arts. By following these steps and practicing consistently, you'll be able to master this move and use it to impress your opponents. Remember to warm up properly, master the basic jump, practice the scissor motion, and add the kick. With time and practice, you'll be doing scissor kicks like a pro!
Related video of How To Do A Scissor Kick

Are you looking to build strong, powerful legs? The rear elevated split squat is a highly effective exercise that targets the glutes, hamstrings, quads, and calves. In this article, we'll take a closer look at this exercise and provide you with a step-by-step guide on how to perform it correctly.
What is a Rear Elevated Split Squat?

The rear elevated split squat, also known as the Bulgarian split squat, is a variation of the regular split squat. It involves elevating the rear foot on a bench or step, which increases the range of motion and places more emphasis on the front leg.
Benefits of the Rear Elevated Split Squat

The rear elevated split squat offers several benefits, including:
- Increased muscle activation in the glutes, hamstrings, quads, and calves
- Improved balance and stability
- Reduced risk of injury by strengthening the stabilizing muscles around the knee
- Increased overall strength and power in the legs
How to Perform the Rear Elevated Split Squat
Follow these steps to perform the rear elevated split squat:
- Stand with your back to a bench or step, and place one foot on top of it.
- Step forward with your other foot, so that your legs are in a split stance.
- Lower your body down until your rear knee is hovering just above the ground.
- Push back up to the starting position.
- Repeat for the desired number of repetitions, then switch legs and repeat on the other side.
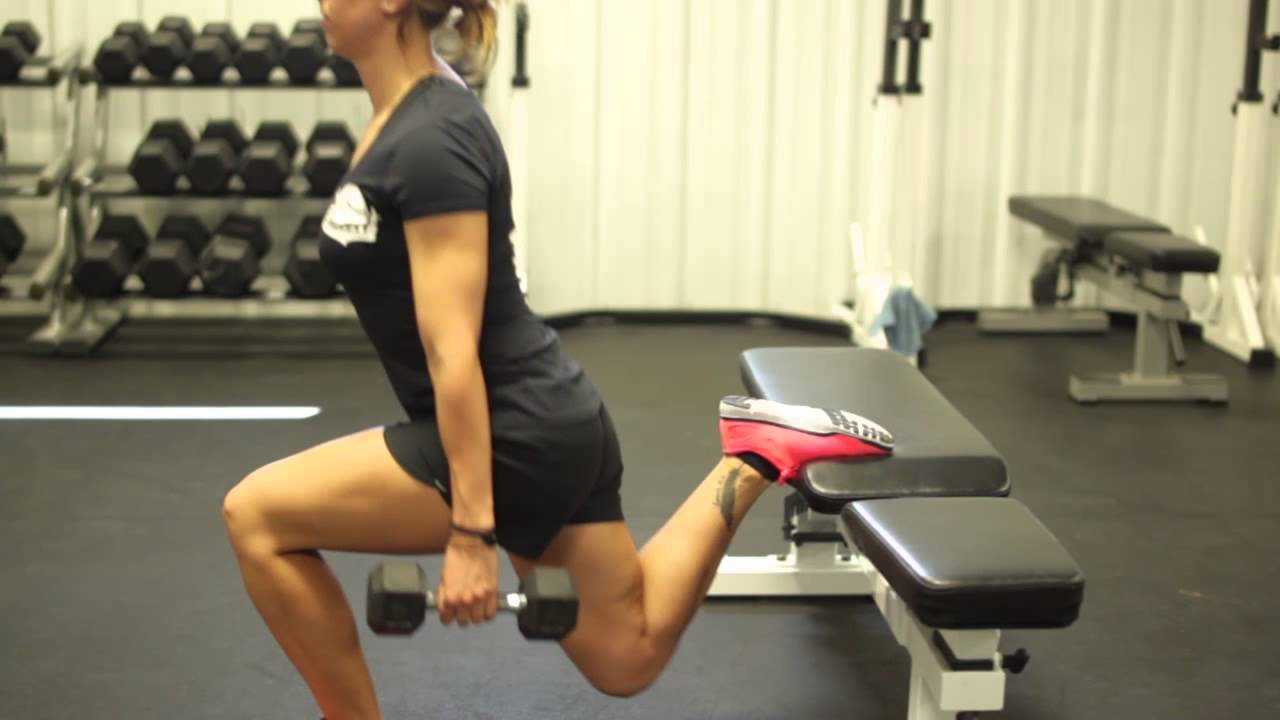
Make sure to keep your front knee in line with your toes and your back straight throughout the movement. You can hold a dumbbell or kettlebell in each hand to increase the intensity of the exercise.
Variations of the Rear Elevated Split Squat
There are several variations of the rear elevated split squat that you can try to keep your workouts challenging and interesting:
- Jump split squats: Instead of simply stepping forward and back, jump explosively from one position to the other.
- Isometric split squats: Hold the bottom position of the split squat for a set amount of time to increase time under tension and build strength.
- Single-leg Romanian deadlifts: This exercise targets the hamstrings and glutes while also improving balance and stability.

Conclusion
The rear elevated split squat is a highly effective exercise for building strong, powerful legs. By following the correct form and technique, you can reap the benefits of this exercise and take your leg training to the next level.
Related video of Rear Elevated Split Squat: A Comprehensive Guide
Introduction
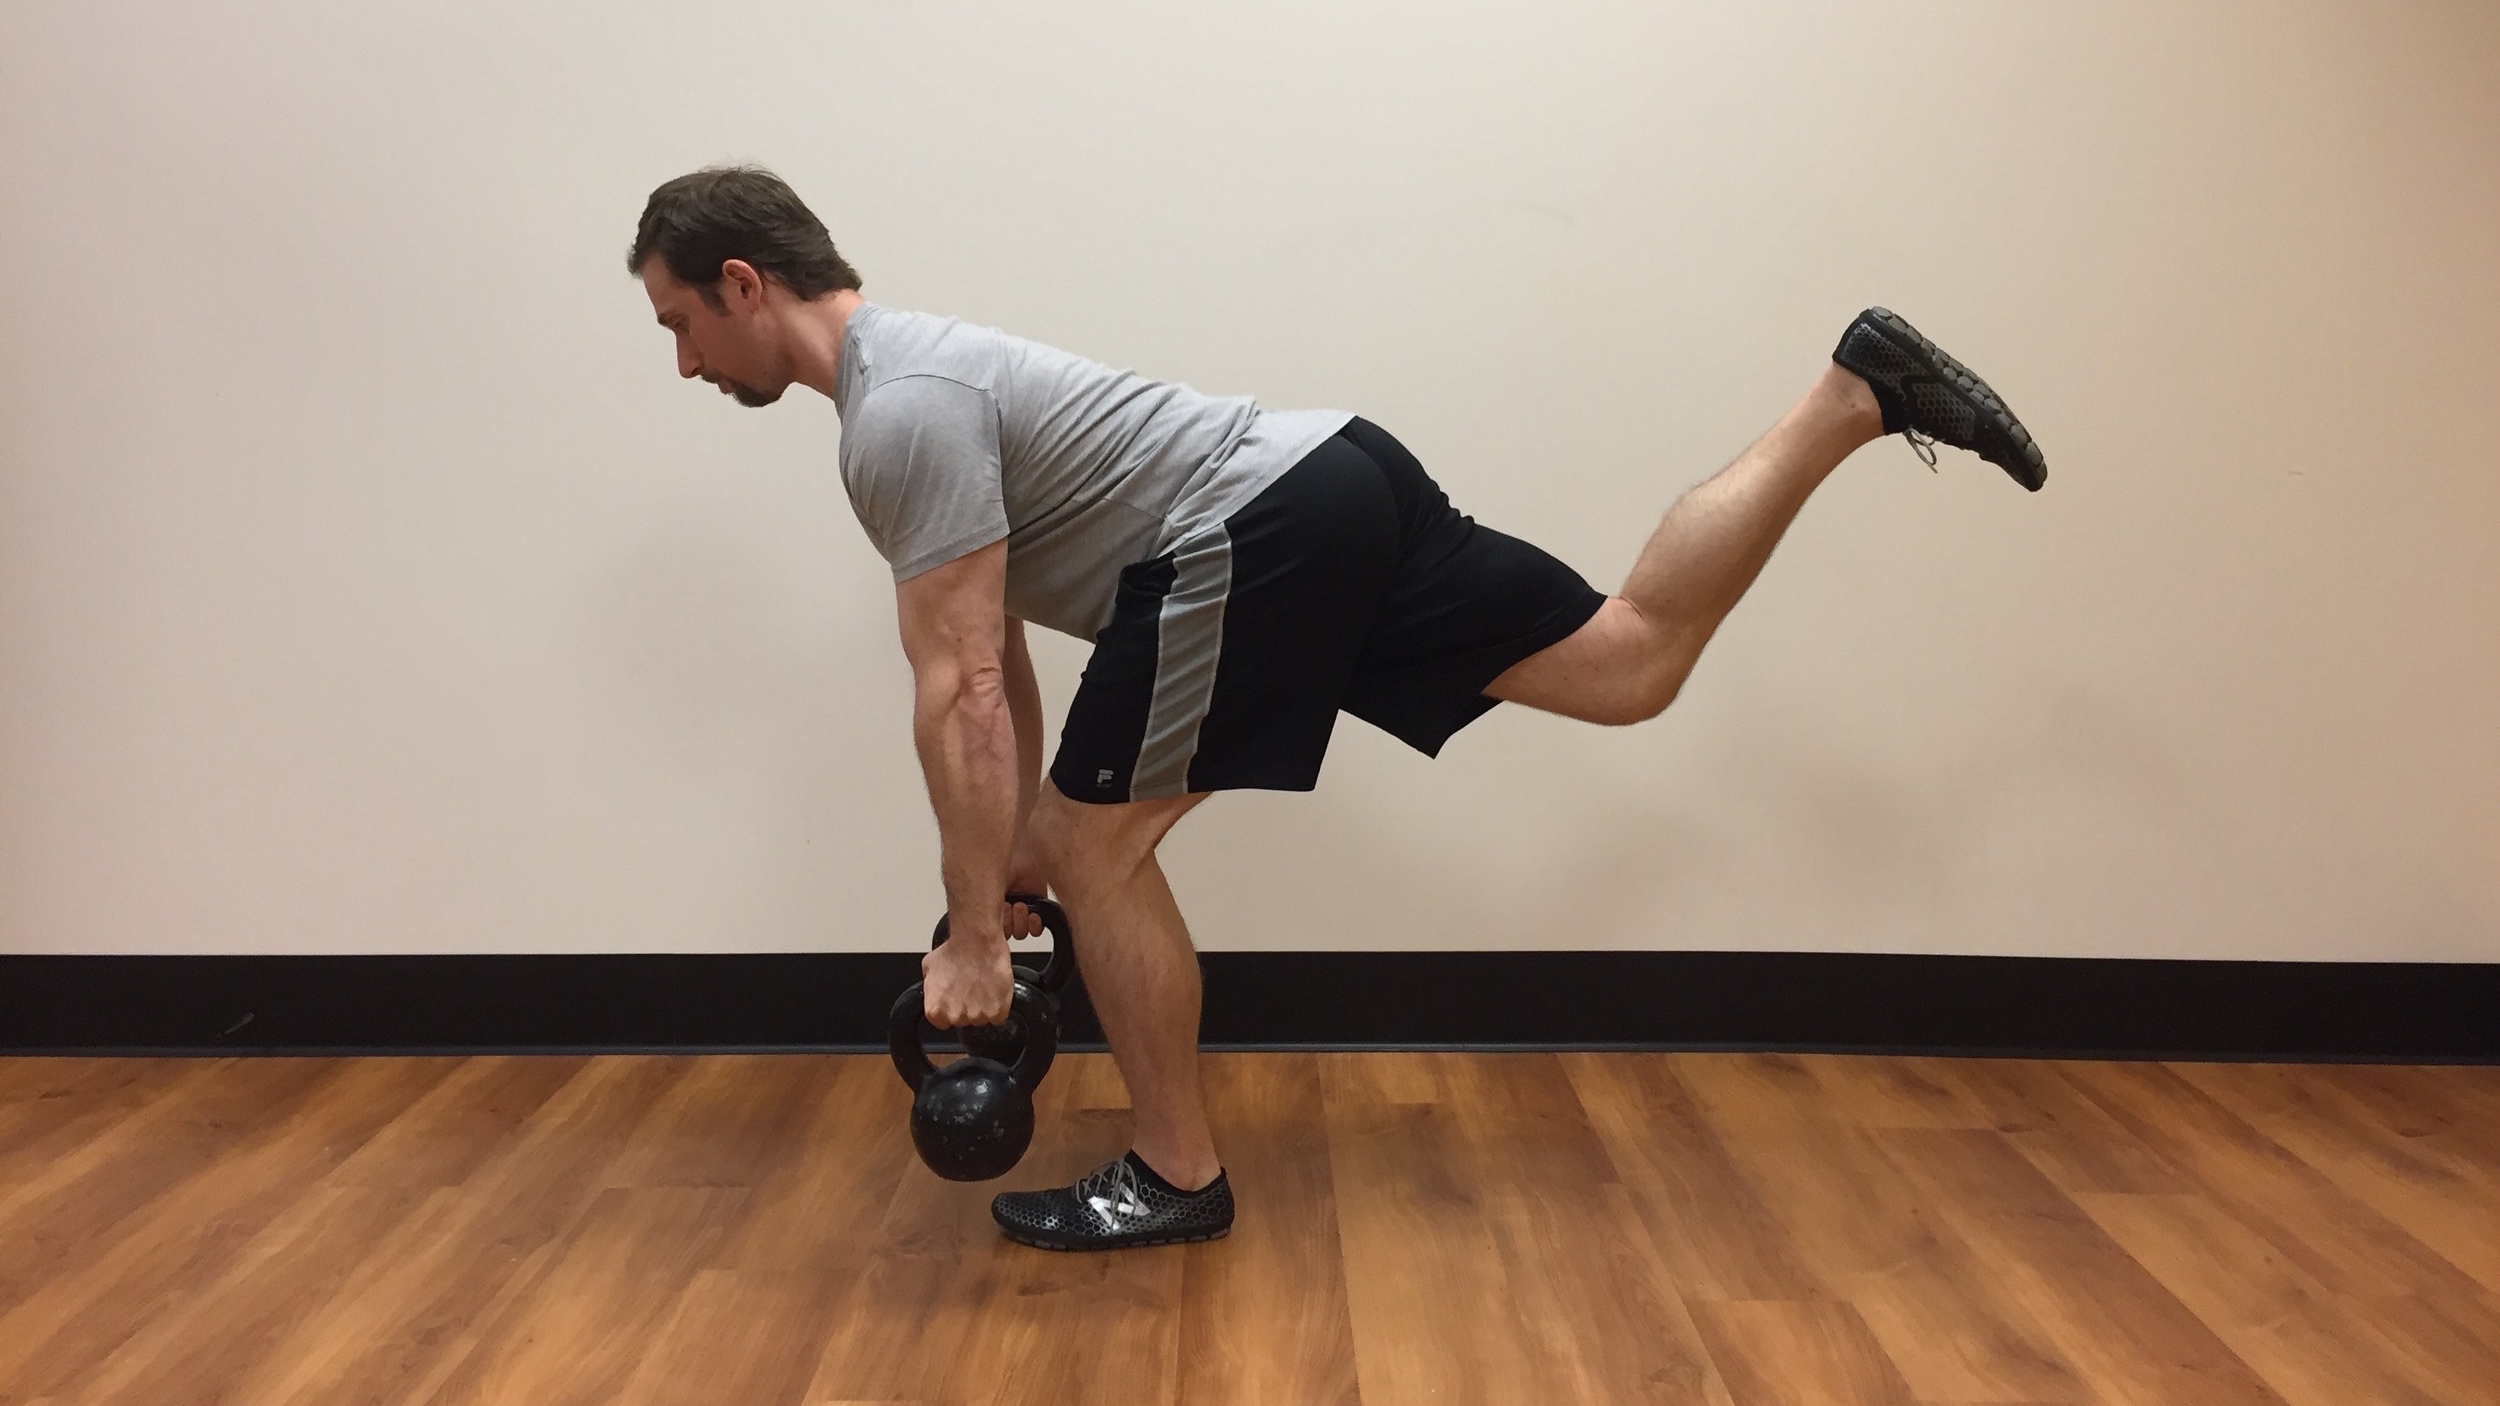
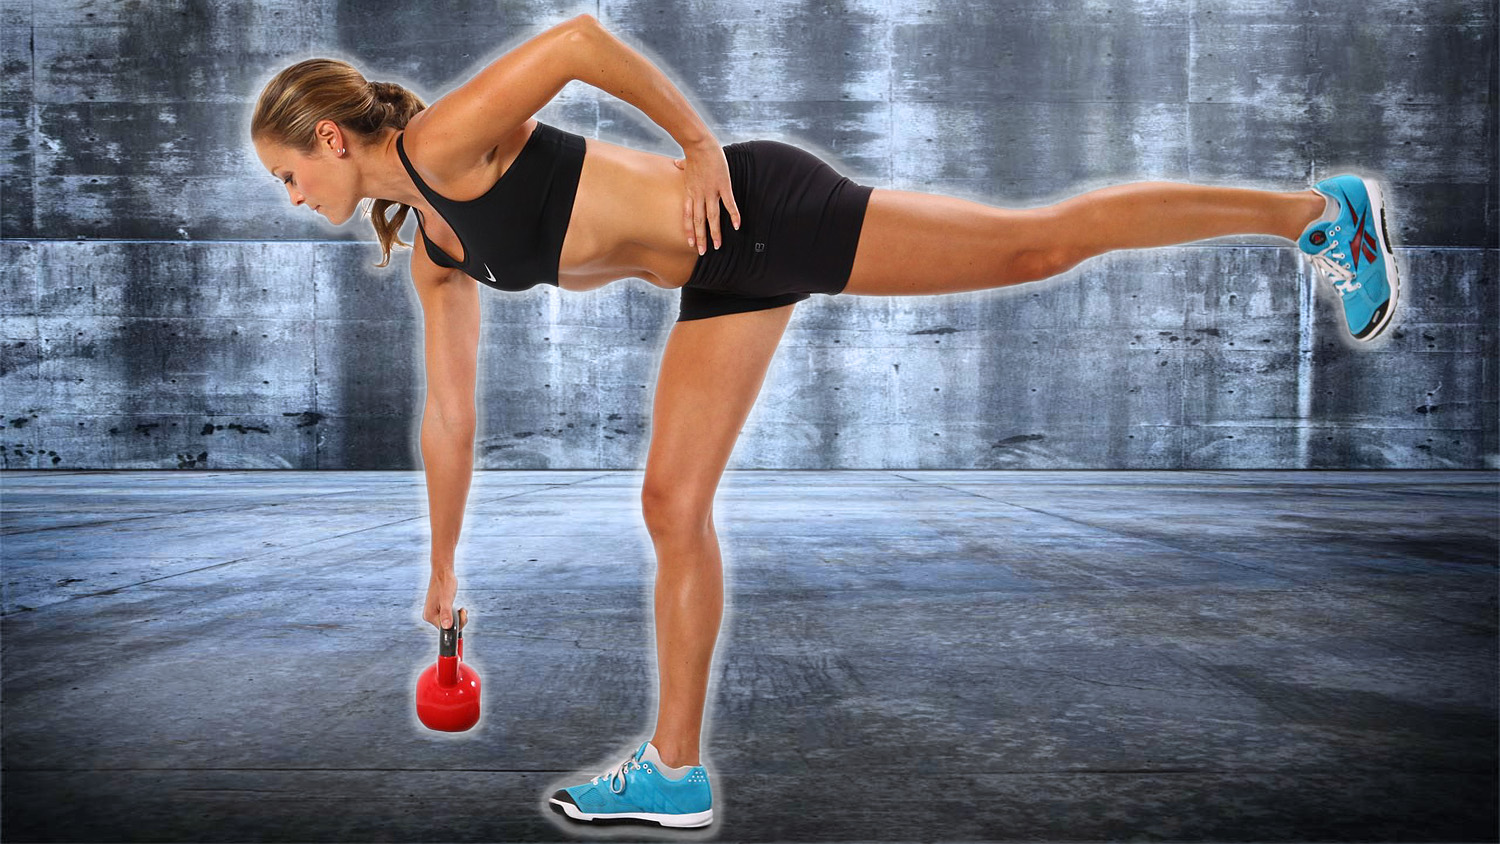
Single Leg Romanian Deadlifts (RDLS) are a popular exercise that targets the hamstrings, glutes, and lower back muscles. This exercise is effective in building overall leg strength as well as improving balance and coordination. In this article, we will discuss what Single Leg RDLS work and how to perform this exercise correctly.
What are Single Leg RDLS?
Single Leg RDLS is a variation of the traditional Romanian Deadlifts exercise. The main difference is that in Single Leg RDLS, you lift one leg off the ground and perform the exercise with the other leg. This variation increases the intensity of the exercise and challenges your balance and stability.
What Muscles Do Single Leg RDLS Work?
Single Leg RDLS primarily work the hamstrings, glutes, and lower back muscles. This exercise also engages the core muscles to maintain balance and stability. Additionally, Single Leg RDLS work the quadriceps, calves, and upper back muscles as secondary muscles.
How to Perform Single Leg RDLS?
To perform Single Leg RDLS, follow these steps:
- Start by standing with your feet hip-width apart and your arms at your sides.
- Lift one leg off the ground and keep it slightly bent.
- Slowly hinge at your hips and lower your torso towards the ground while keeping your back straight.
- Lower the weight until you feel a stretch in your hamstrings.
- Pause for a second and then lift your torso back up to the starting position.
- Repeat for the desired number of reps and then switch legs.

Benefits of Single Leg RDLS
Single Leg RDLS offer several benefits to your body:
- Builds overall leg strength
- Targets the hamstrings, glutes, and lower back muscles
- Improves balance and stability
- Engages the core muscles
- Increases flexibility and range of motion
Common Mistakes to Avoid
Here are some common mistakes to avoid while performing Single Leg RDLS:
- Avoid rounding your back while lowering your torso. This can cause strain on your lower back muscles.
- Do not lift your leg too high off the ground. Keep it slightly bent and close to the ground to maintain balance.
- Do not rush the exercise. Perform it slowly and with control to avoid injury.
Conclusion
Single Leg RDLS are an effective exercise for building leg strength, improving balance and stability, and engaging the core muscles. By performing this exercise correctly and avoiding common mistakes, you can achieve better results and prevent injury. Incorporate Single Leg RDLS into your workout routine and see the difference it makes!
Related video of What Do Single Leg RDLS Work?

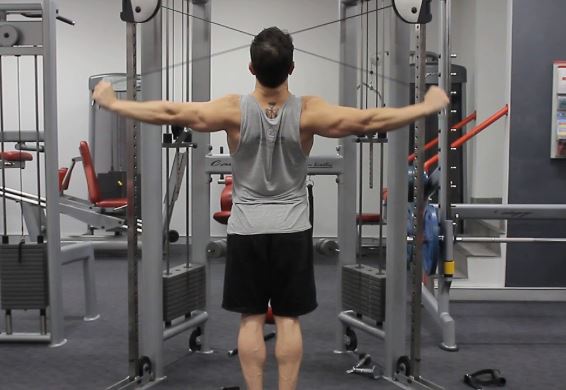
Building a strong back is essential for overall fitness and body balance. The standing reverse cable fly is a popular exercise that targets the muscles in the upper back and shoulders. In this article, we will discuss the benefits of this exercise and techniques to perform it correctly.
Benefits of Standing Reverse Cable Fly

The standing reverse cable fly is a great exercise for strengthening the muscles in the upper back and shoulders. This exercise targets the rhomboids, rear deltoids, and middle trapezius muscles. Here are some benefits of this exercise:
- Improves posture and balance
- Increases upper body strength
- Reduces the risk of injury
- Enhances shoulder mobility and flexibility
Techniques to Perform Standing Reverse Cable Fly

Here are the techniques to follow when performing the standing reverse cable fly:
- Stand in front of a cable machine with a D-handle attached to the low pulley.
- Grasp the handle with an overhand grip and step back to create tension in the cable.
- Stand with your feet shoulder-width apart and your knees slightly bent.
- Engage your core and maintain a neutral spine throughout the exercise.
- Exhale and pull the handle towards your chest, squeezing your shoulder blades together.
- Pause for a second at the top of the movement and inhale.
- Slowly lower the handle back to the starting position while exhaling.
- Repeat for the desired number of reps.
Common Mistakes to Avoid
Here are some common mistakes to avoid when performing the standing reverse cable fly:
- Using too much weight
- Performing the exercise too quickly
- Not maintaining proper form and posture
- Not engaging the core muscles
- Not fully extending the arms at the bottom of the movement
Variations of Standing Reverse Cable Fly

Here are some variations of the standing reverse cable fly:
- Single-arm standing reverse cable fly
- Seated reverse cable fly
- Standing reverse cable fly with rope attachment
- Standing reverse dumbbell fly
Conclusion
The standing reverse cable fly is a great exercise to target the upper back and shoulder muscles. By following the correct techniques and avoiding common mistakes, you can improve your posture, increase upper body strength, and reduce the risk of injury. For variation, you can try different versions of this exercise. Incorporate the standing reverse cable fly into your workout routine and enjoy the benefits it brings!